
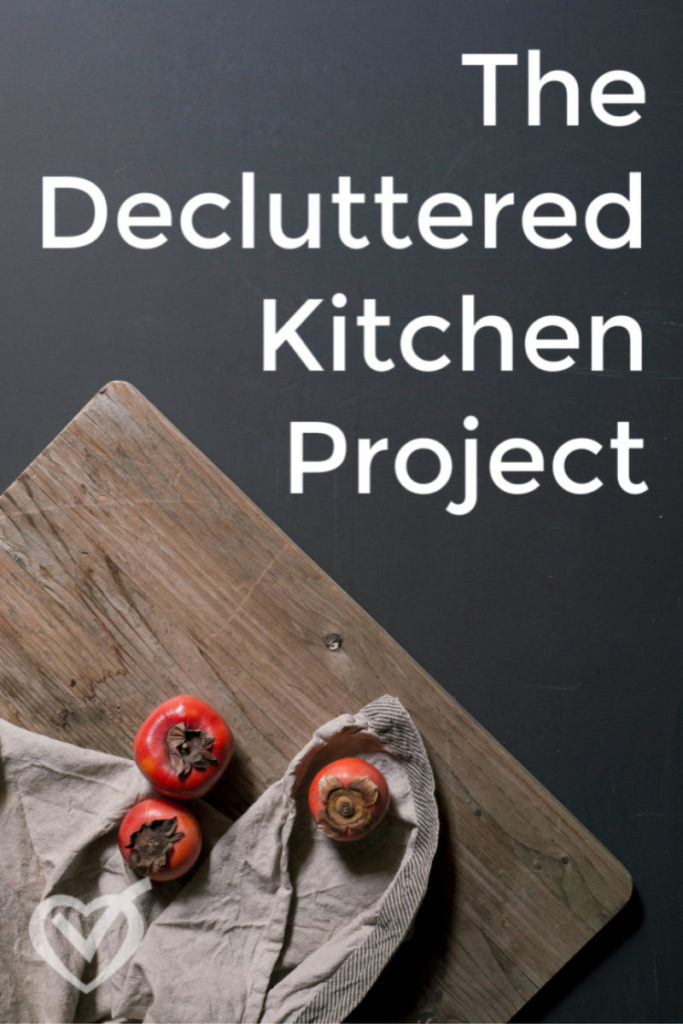
A decluttered kitchen is one of the first projects to undertake when minimizing and simplifying your home life. If you’ve ever wondered how to organize your life, you’ve probably thought of your cluttered kitchen. A decluttered kitchen helps with an organized, prepared life.
So let’s take a look at the steps to achieving the goal of a decluttered kitchen.
Step One: Take Stock
What’s in your pantry right now? Half-used bits and pieces of specialty ingredients just waiting until they are old enough to be thrown away without guilt? Maybe boxes of Rice-a-Roni or Hamburger Helper? Unknown substances lurking in dark corners?
The first step to simplifying and organizing your kitchen is decluttering. And the best way to declutter is to empty the space and see what exactly is there.
- Empty your pantry space(s).
- Wipe down the empty shelves.
- Label shelves and any containers with categories: cans, bags, bulk, baking goods. Use whatever categories make sense to you.
- Take inventory. Make a two-column list: pantry staples and specialty ingredients. Pantry staples will be any food that you regularly use and would like to always keep on hand. Specialty ingredients will include those things purchased for specific recipes but that you don’t regularly use. If you are considering a complete overhaul and dramatic simplification, you might want to start with Simplified Pantry’s master pantry list, but feel free to personalize it.
- Put things back the way you’d like them. You might consider adding labels to your shelves to make it easier to put things in their right place.
Repeat this process with your fridge, freezer, and any other place you have food stored for a decluttered kitchen. You will want to finish with a complete list of all your food inventory.
Step Two: Dealing with Your Pantry Contents to Declutter Your Kitchen
After determining what no longer belongs in your inventory (the Simplified Dinners eBook has this already thought out for you), you’ll need to decide what to do with those things you’d rather not have anymore.
You can
- Use them up.
- Toss them out.
- Give them away.
- Add meals that will use up ingredients you don’t want to waste to your next couple week’s menu plan.
- Toss out any expired or spoiled foods.
- Give canned, packaged, or shelf-stable items to your local food bank if they are items you know your family won’t eat or items that no longer fit your food philosophy.
It will feel so good to clear out your space from those previous purchases and simplify your stock on hand! You’re already well on your way to a decluttered kitchen with just this second step.
Step Three: Analyze, Reorganize, & Purge Your Soon-to-be Decluttered Kitchen Work Spaces
Where do you keep food stuffs in your kitchen that are in-use and on-hand rather than stored in a pantry? Do you have canisters of flour and sugar on the counter? A cupboard with the cooking basics? A drawer with your go-to ingredients? A shelf with your spices?
Today, go through all the places you keep ingredients on hand. You don’t need to inventory in-use items, but you should make plans for any ingredients you know you’d rather not have.
Are your ingredients handy? Efficiently arranged? You can peruse my August Series 5 Days to Organized Kitchen Work Spaces to pick up some tips on setting things up effectively once you have a decluttered kitchen.
The basic principle of organizing both food and tools in the kitchen is that like goes with like and the most used should be the most easily accessible.
Right now, though, focus primarily on the food itself and clearing out or using up the odds and ends stuck in the back corners. Also, look to see if there are things here that need to be added to your master pantry list inventory that were not in your pantry itself. Are you out of any basic ingredient? Do you have an item that should have a home but just sits out instead? It’s time to look over what you have, the space you have, and where each item should belong.
Step Four: Go Through Your Fridge
So, open up that fridge and explore the back, the drawers, and the dark corners. Don’t let it get you down; you’re dealing with it all now and it will feel great when it’s all out in the open, cleaned up, and dealt with. You’ll be one step closer to a decluttered kitchen!
Again, the best way to figure out what you have and what you should do is to
- empty the fridge
- wash it out
- label (even just with a Sharpie!) the shelves and drawers
- return things in a more orderly way
So, what is in your fridge now? Probably you found stuff to toss as you peered through the contents.
Sometimes it seems that because I feel bad throwing out perfectly good food when it is perfectly good, I put it in the fridge so that it has a chance to go bad. Then I don’t have to feel guilty tossing it out after it has a mold crust. When I stick it in the fridge I tell myself that I will use it, but the truth is that I’ll just conveniently forget about it until it’s useless. That’s not how we want to maintain our decluttered kitchen, now, is it?
Keeping less food, keeping the fridge organized, and keeping a plan really does help with this scenario. Let’s start now!
- What do you need to use up soon? Make a plan to do so.
- What belongs on your master pantry list? Add it to the inventory list.
- What day of the week will you commit to confronting the contents of your fridge? The day before grocery shopping or on kitchen-cleaning day are good options.
Decluttering your kitchen means following guidelines like these.
Step Five: Clear the Freezer(s)
If the contents of our fridge were a testimony to our food-denial, then the contents of our freezer – or freezers – is that to the tenth degree!
“I should use this sometime. I’ll just stick it into my freezer for ‘later.’”
Later, in this case, means when it is so covered in frost and freezer burn that you have no idea what it even is or how long it’s been there, so the only option is to throw it away and feel good about accomplishing a purging. Time to declutter!
We need not only to organize and inventory and plan, but we need to be honest with ourselves. It might seem like a good idea, but will you use peach pie filling before next peach season rolls around? Your friend might make amazing freezer jam, but do you like it? Will you actually use it throughout the year? If you stick a freezer meal in the freezer, is it one you’ll avoid pulling out or one you can’t wait to use?
Don’t make or keep food based on other people’s preferences or accomplishments, but on your own reality in your house, in your life. Know yourself and your family and make and keep food for them and not for guilt or envy or fear or Pinterest. Be honest and realistic, and then make sure you do open up that freezer and pull stuff out to use throughout the year. Remember that whatever it is you’re freezing, it is meant to be eaten, not meant to be a monument to your good sense or homemaking skills.
Go through the now-familiar organizing process with each of your freezers.
Again, the best way to figure out what you have and what you should do is to
- Empty the freezer.
- Defrost it (if needed) & wash it out.
- Label (even just with a Sharpie!) the shelves and drawers.
- Return things in a more orderly way.
- As you put things back, write down every single thing in there.
- Make a plan to use up foods that have been in there long enough.
Knowing what you’ll use, keeping the freezer organized, and creating an inventory really will make a difference. Welcome to nitty-gritty kitchen decluttering.
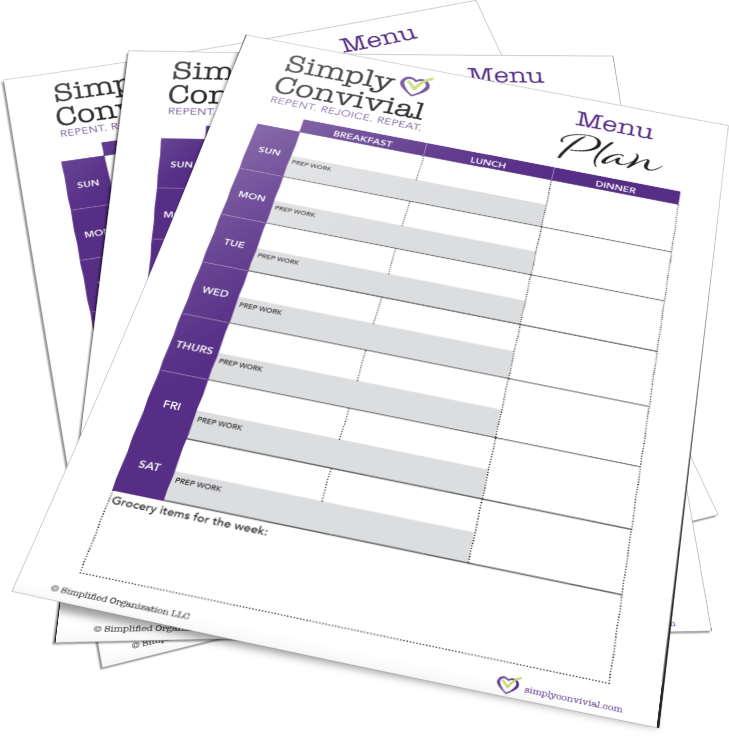
Download the free menu planning templates – including a master pantry list – that will help you get every meal on the table with less fuss.
Step Six: Storing Roots
After tackling organizing and inventorying the freezer, we have only one food storage trouble spot left to declutter: the root cellar vegetables.
One difficulty when setting up a kitchen is finding a place for potatoes, onions, and garlic. Ideally, we’d all have root cellars, with braids of garlic hanging from the ceiling and bushels of potatoes in baskets. Few homes these days, though, have such a location available, not to mention the difficulty of finding braided garlic!
The most important tip on this topic is not to store potatoes and onions near each other. It makes a great photo op, to be sure, and if you go marketing for your vegetables more than once a week, it won’t make a difference. But for those of us buying our onions and potatoes in bulk, in bags from the grocery store, the quality and life of the vegetables will greatly decrease if they are stored where the gasses of one will affect the other.
Best Way to Store Potatoes
- Potatoes prefer: cool, dark, dry, and air circulation
- Potatoes dislike: being near onions, dampness, being stored in plastic
- Storage idea: a brown paper bag in a basement storage area. Put them in meal-sized portion amounts and send a child for a bag when you want potatoes.
- Storage trick: Keeping an apple in the bag of potatoes will discourage sprouting for months.
Best Way to Store Garlic
- Garlic prefers: dark, dry
- Garlic dislikes: being near potatoes or any other fruit
- Storage ideas: Keep them in a tea-towel lined basket on the counter or in a cupboard, with the towel over them, keeping them dry and dark.
Best Way to Store Onions
- Onions prefer: cool, dark, circulating air
- Onions dislike: being near potatoes, warmth
- Storage ideas: Despite it often being not recommended, I’ve had best luck storing my onions in the fridge crisper drawer.
Really, the reason we want a decluttered kitchen is to have an efficiently running kitchen, so let’s make smart choices about where things ought to belong – then put them there.
Step Seven: Create Your Short List for Breakfasts, Lunches, and Snacks
Every family’s plan is going to look different and you can’t really take another’s plan and run with it. So pull up a new note to yourself on your computer or pull out a sheet of paper and consider these questions:
- What will the kids eat? What will I eat?
- What do I want them to eat? What foods do I want to keep on hand?
- What am I willing to prepare? What will I buy?
With your own answers in mind, then brainstorm possible breakfasts, lunches, and snacks. Do not neglect the power of leftovers, even leftover breakfast food for snack time. Leftovers doesn’t have to be about last night’s dinner. Make too many muffins for breakfast and then pull them out for a snack. Make twice as many sandwiches for lunch today so you don’t have to make any tomorrow.
A decluttered kitchen ought not mean that there isn’t anything to eat.
Lists of food ideas for breakfast, lunch, and snacks abound online. Some of my favorites are
Breakfast Ideas
- simple homemade granola
- oatmeal
- German pancakes
- toast with peanut butter & jam
- eggs with cheese
Lunch Ideas
- pbj, of course
- cheese quesadillas (melt the cheese on tortillas in the microwave)
- what’s-in-the-fridge buffet
- cheese, bread, and veggies or fruit
- simple tahini with veggies & bread
Snack Ideas
- cheese
- veggies
- hardboiled eggs
- leftover breakfast or lunch
- yogurt & fruit
Think it through, write it down, and then just go with your list. Don’t think it through any more. Don’t argue about it with yourself or with the kids. Just do it. Pretty soon it will be routine, habit, and will take no conscious effort to just pull out these meals.

Step Eight: Note Your Constraints
Before you begin, list out your various constraints on what dinner ideas will work for your family. These constraints will actually make your meal listing easier! So many recipes and meal plans abound that ruling a bunch out before beginning makes the process more simple and less stressful.
Are there taste and preference constraints? Budget constraints?
Now, look at your master pantry list you created for yourself as you cleaned out your food stuffs. This is also a constraint. If you want menu planning and grocery shopping to be simple, you need to eliminate any meal that requires special ingredients (special occasions get exceptions, of course). You want all your meals to rely on what you have committed to keeping on hand so that you don’t have to keep a special grocery list and make sure you get to the store before having a planned meal. Plus, this makes grocery shopping so much simpler, because you go in knowing what you buy, and you can ignore the rest.
This step is where you begin to experience the relief and benefit of having a decluttered kitchen and simplified meal process.
Decide on 5-8 meal types
Before delving into the world of cookbooks and recipes, limit yourself further. What meal types will constitute your go-to selection?
- Pasta
- Mexican (tortilla-based)
- Rice
- Soups
- Salads
- Casseroles (maybe ones that freeze, so you can double them some nights and eat freezer meals a few times a month?)
- Roasts
- Cuts of meat (pork chops, beef steaks, chicken thighs)
- Beans or lentils
- Bread & cheese
- Leftovers buffet
The easiest way to do this is to pick one meal type for each day of the week. You can always remain flexible and move them around within a week, but if you have 6 or 7 different types of meals and each one only getting table time once a week, you get the benefit of seeming variety but the ease of regular routine.
We are decluttering not only the kitchen, but also the entire menu planning process.
List specific dinners
Now we get more specific and add the final constraint to our dinner plans.
For each meal type you picked, list 3-5 specific dinners, with recipes. You’ll end up with 18-35 dinner choices — plenty for variety but not so many you forget them or have to go searching Pinterest or trolling message boards for “What’s for dinner tonight?”
Remember to select only recipes that you can adapt to use only your master pantry list, so you don’t have to menu plan before going grocery shopping. Go grocery shopping based on what you need off your master list and menu plan off your short dinner list, and everything comes together without elaborate schemes.
Welcome to the running of a decluttered kitchen.
Step 9: Decide What You Will Make from Scratch & What You Will Buy Ready-Made
When making your mastery grocery list, you’ll want to consider what you want to make from scratch and what you will buy ready-made or mixes: barbecue sauce? sandwich bread? marinades? ketchup? spaghetti sauce? brownies?
This is a tricky subject, but one that is best to think through up front and rationally. Banish the vague feelings that because you can make something from scratch, you therefore should. That is not true. You need to take into consideration all that goes into the decision:
- The cost of the ready-made ingredient v. the cost of the ingredients of the ingredient.
- The time involved in making the item from scratch.
- Your family’s health and quality standards.
- The difficulty in keeping the item on hand (can it be frozen? how long does it store? would you have to make it every time you wanted it?)
- Whether you love or hate diy.
So, what do you use in your cooking? What shortcuts are worth the expense to you? What is worth your time because you love the quality? How much time do you want to spend in the kitchen? There is no wrong or right or one-size-fits-all answer. But as you decide, make the note on your decluttered kitchen master grocery list.
Will your mastery grocery list say “salsa” because you use it all the time and have a brand you like, or will it say “cilantro” because you love PW’s Restaurant-Style Salsa (which freezes nicely)?
Tomorrow we’ll finalize the master pantry list we’ve been working on all month.
Resources for DIY Ingredients & Foods
- Make the Bread, Buy the Butter: What You Should (and Shouldn’t!) Cook from Scratch to Save Time and Money | $9.59 paperback
With delightful humor, Jennifer Reece not only gives 120 recipes with eminently practical yet deliciously fun “make or buy” recommendations, she also weaves a tale of living with a backyard full of cheerful chickens, muttering ducks, and adorable baby goats; countertops laden with lacto-fermenting pickles; and closets full of mellowing cheeses. She gives a full picture of what is involved in a truly homemade life and tips for getting the most out of your time in the kitchen — with the good news that you shouldn’t try to make everything yourself.
From Amazon: “The Homemade Pantry was born of a tight budget, Alana’s love for sharing recipes with her farmers’ market customers, and a desire to enjoy a happy cooking and eating life with her young family. On a mission to kick their packaged-food habit, she learned that with a little determination, anything she could buy at the store could be made in her kitchen, and her homemade versions were more satisfying, easier to make than she expected, and tastier.”
Decluttered Kitchen Step 10: Plan for Emergencies and Failures
Yes, even a decluttered kitchen will face both emergencies and failures.
Even with a list of simple meals, some nights just don’t go as planned and a plan B becomes a necessity. Rather than having pizza or take-out be your plan B, have a planned back-up plan B like a carton of soup, jarred spaghetti sauce & pasta or even a pizza in the freezer. Find something that you like and that can come together within 15 minutes.
It might cost more than a from-scratch meal and it might have less desirable ingredients, but emergency dinner situations do crop up, and it will still be less than delivery and fewer undesirable ingredients (and calories) than burgers. Knowing you have options should dinner fail or the hour surprise you or some other emergency befall goes a long way toward reducing stress.
So pick an emergency meal or two and add those elements to your master pantry list.
Step 11: Finish Up the Master Grocery List
If you’ve been taking notes on a master list during your kitchen decluttering already, then you’ve got it. If you haven’t, then now is the time to go back over the previous days and get that list written down in its entirety: all the spices and herbs, all the baking supplies, all the cold items, all the produce, all the canned and dried goods, all that you need to prepare what you’ve listed – and nothing more.
Once you have all the items in a list, you’ll likely want to organize the list to make it more useful. List the categories of foods together as they are grouped at your most frequently used grocery store or as they are grouped in your pantry spaces.
With this list, then, you can make a quick grocery list without referring to recipes or the calendar or ads or coupons. Print out a clean copy, go around your kitchen and pantry and circle what you need to replenish or cross off what you don’t need to purchase. Five minutes or less and you have a complete resupply grocery list.
Wonder of wonders!
Download the free menu planning templates – including a master pantry list – that will help you get every meal on the table with less fuss.
Decluttered Kitchen Step 12: Declutter Your Recipes
It is so easy to collect a mountain of recipes, particularly with the advent of food blogs and Pinterest. While it can be inspiring to see so many ideas, it can also be overwhelming. Our kitchen needs even its recipes decluttered.
Having a limited master pantry list gives you a filter through which you can reduce the mental, paper, and bookmark clutter that the abundance of options brings. Unlimited choices are actually paralyzing, not freeing. With a simplified approach you will have limited options, but it is much easier to pick between 5 or 10 desserts than 100s.
If you really want to get serious about simplifying and decluttering, then toss and delete all your accumulated recipes that do not fit with your plan. It’s not a necessary step; you could keep them all on hand “just in case.” But if you did ever want them again, there’s always Google.
If this is your first attempt at switching from a typical American diet to eating real foods, it can also be helpful to simply get rid of the recipes that might tempt you off your new track. Keep the real foods options forefront and stop collecting pins about all the ways to use a cake mix.
As with all purging and decluttering, there is a peace and calm that comes with fewer options and less stuff. That’s a decluttered kitchen!
Decluttered Kitchen Step 13: Plan Hospitality Options Ahead of Time
One of the jobs of a kitchen is extending hospitality. When the kitchen is decluttered, it can fulfill that function more readily with less stress.
Oftentimes we get ourselves a bit too wound up over hospitality. Having people over should be about sharing life and doing life together, not about impressing others and making ourselves look good.
It’s helpful to have preplanned options for inviting another family over for dinner, for taking a meal to a new mother, or for bringing a dessert to a social function. If it’s preplanned and simply sharing life, the stress that often accompanies having people into our homes can be greatly reduced.
To get you started, here are my own short lists.
Dinner Hospitality
- pulled pork in the crockpot on buns with coleslaw
- beef roast, roasted potatoes, salad or roasted veggie
- taco bar (great for picky eaters or food intolerances, since each person can take what they want)
- soup, artisan bread, salad
Recipes for all of these can be found in my eBook, Simplified Dinners.
Taking Meals to Others
- pulled pork, buns, coleslaw
- soup, bread, salad
- black bean chili, cornbread or chips, cheese & sour cream, salad
- not-spaghetti, salad, garlic toast
Recipes for all of these can be found in my eBook, Simplified Dinners.
Easy Desserts for crowds
- Best all-butter chocolate chip cookies
- Brownies
- Best Ever Chocolate Sheet Cake
- Caramel Popcorn (can be made without the cinnamon, almond bark, & nuts)
Decluttered Kitchen Step 14: Organize Your Remaining Recipes
You don’t want to spend as much time finding a recipe, a process, or inspiration as you do cooking dinner. That’s not functioning with a decluttered kitchen. We want to get dinner on the table with as little thought, time, and energy as possible.
That means the recipes or notes for your go-to plan have to be accessible.
There are many ways to do this, of course, but the way not to do it is to have your frequently-used recipes and meal ideas scattered in cookbooks, recipe cards, Pinterest boards, and bookmarks. You want a one-stop location that holds all the lists, information, or recipes you refer to often. Whether that location is digital or paper depends entirely on your preference.
Paper Organization Options
- binder
- home-printed spiral-bound cookbook
- recipe-card box
- recipe-card binder
Paperless Digital Organization Options
- Evernote (you can scan or photograph handwritten notes, even, and they are searchable)
- Blog
- Word document or pdf
- File folder with various files (saved webpages, scanned recipes, photos, documents, etc.)
Choose a way that works best for your personality and resources, set it up, and you will be ready to roll with your kitchen decluttered!
Step 15: Identify Your Food Sources
Where do you shop?
The first step to creating a grocery shopping strategy – yes, strategy – is to decide on which stores you will frequent. This depends entirely on your area and your style. As you think through your options, consider these questions:
- Which stores have the absolute best non-sale prices?
- Which stores have great weekly sale items?
- Which stores are not worth the time to even look at the ads, because the prices are never lower than the discount grocer’s normal prices?
- What local resources do you want to use? (butcher, farmer’s market, eggs/dairy, etc.)
- Are you going to be an extreme couponer? Or would you rather keep things simple? Is it worth the time to you? Do you buy items that have coupons?
- Do you have any bulk food sources?
- Is there a bigger city nearby where you might do larger trips less frequently?
- Do you care about organic/local/etc.?
There are so many factors that there is no one-size-fits-most strategy. If you have no idea what you “should” settle on, spend some time polling friends and random local people as to where they usually shop and why. Try out all your options, bringing a short list of your top 5-8 basic items and price compare.
One goal you want to accomplish with this step is eliminating guilt or vague uncertainty. Do you think you “should” shop at a lot of stores to get the best deal at each one? You might actually find that the local discount grocer’s normal prices are the same as the rock-bottom deals at Safeway. So why bother with Safeway, unless it’s really close or carries something the other doesn’t or some other reason? Do you not know what your options really are, so you just shop at the closest grocery store by default? Take a little time and do at least a basic comparison or just think it through intentionally, eliminate some of the options and feel good about doing so rather than guilty.
5 Methods of Keeping Meat in Stock
1. Shop the Weekly Specials
Of course if you want to get the best deals on meat, the obvious way is to look at all the grocery store ads and take advantage of the best sales. Be careful, though, because often listed “sale” prices aren’t actually lower, and the
Advantages
- Takes advantage of loss leaders & gets the best deals available
- More options are available
Disadvantages
- Takes weekly research time
- Takes more time to shop at more stores
2. Choose the Best Regular-Priced Options
If you have a favorite store or two and very little time to spend on price comparisons, then the simplest thing to do is to scope out the options at your store(s) of choice and figure out what they always carry at a good price. Think about how much meat you need in a week or a month and decide something like, “Every month I’ll buy ground beef, a pack of ham steaks, a pork roast, a bag of boneless chicken thighs, and 2 whole chickens.”
Advantages
- Think through it once and never have to again.
- Makes it easy to pass the list off to another shopper.
- Speeds up the grocery trip.
Disadvantages
- Doesn’t take advantage of the best deals.
- Might end up with less variety.
3. Shop the In-Store Specials at One or Two Discount Grocers
This is a compromise of sorts between the first two options. Pick your standard grocery shops, then whenever you are shopping, browse around for the best sale items (or near-expiration discounts) available then. If you get a chance to talk to a knowledgable employee or a manager in the meat department, you might even be able to find out when they mark down meats.
Advantages
- Takes no research time at home.
- Don’t have to spend the extra time or gas shopping at several stores.
Disadvantages
- Takes more time at the store.
- Sometimes there might not be any deals to be had.
4. Buy in Bulk from a Local Butcher or Small Farm
Buying a whole or part of a cow, pig, or chicken directly from a local farmer or butcher can be a great way to affordably get a variety of cuts and cut down your grocery store time significantly. It’s a great feeling to have a freezer full of meat, full of potential dinners just needing a few supporting pantry ingredients.
Advantages
- Stocking your freezer means less time and thinking at the store.
- Usually the quality of meat is much greater.
- Supports local businesses and farmers more directly.
Disadvantages
- It’s a large upfront cost.
- You need to have a large freezer.
5. Buy in Bulk from a Distributor like Zaycon Foods
This option is similar to buying from a butcher, but might be more viable if there are not many local options in your area. Zaycon Foods sells meat by the wholesale case, making occasional scheduled truck deliveries to towns around the US.
Advantages
- Low wholesale price, lower than almost any sale price at a store.
- Never frozen, high quality meat.
- Bulk purchases mean you have to think about and purchase it less often.
Disadvantages
- Might not be available in your area.
- Higher upfront cost.
- Requires freezer space.
These are some differing strategies for acquiring meat for your menu plan. I’ve tried most of them and found each to be useful in different life circumstances. Try them out and find out which way works best for you!
Five Strategies for Buying Produce
How do you procure your produce?
1. Shop based on the weekly grocery ads
This is many people’s default method, but it does require a lot of time – both to look through the ads and to stop at multiple stores.
Advantages:
- Takes advantage of the lowest prices offered.
Disadvantages:
- Often the large chain stores that offer loss-leader deals are not carrying local produce.
- Takes a lot of time.
2. Shop at one or two favorite stores and select standard seasonal options
In my town, the store that usually has the best prices (and local produce) doesn’t put out ads, and often their regular price is Safeway’s sale price. So I don’t bother browsing ads or driving all over town. I shop at my standard grocery store and buy onions, carrots, garlic, zucchini, and cabbage, and then additionally whatever else is on sale, which usually coincides with what is in season.
Advantages:
- No research or running around town necessary.
- You reliably get good produce at a good price, with minimal effort and time.
Disadvantages:
- The discount grocer might not carry the best produce in town.
3. Patronize a local farmer’s market or produce stand
If you live in an area with agriculture, there are likely several farmer’s market or produce stand options, where the growers themselves are there selling. If you are not in an agricultural area, farmer’s markets might just be the same trucked-in vegetables as Safeway carries but with a surcharge for the trendy experience. Know your own area and your options.
Advantages:
- In-season, local produce
- A higher percentage of your cost goes to the farmer rather than middle men
- Usually very good quality produce
Disadvantages:
- Limited hours, days, and seasons
- Not always less expensive
4. Subscribe to a CSA (Community Supported Agriculture)
A growing trend is for local farmers to offer subscription vegetable deliveries. Customers pay upfront before the season begins and receive a weekly delivery (which must be picked up) of whatever is ready to be harvested on the farm.
Advantages:
- In-season, local produce, picked ripe
- A higher percentage of your cost goes to the farmer rather than middle men
- Usually very good quality produce
Disadvantages:
- Unpredictable types and amounts of vegetables
- You have to get get your box at a set day and time
- Only available seasonally
5. Plant a garden
Of course, if local, seasonal, picked-ripe produce is important to you, then the best way to get it is from your own backyard! It is lovely to be able to step out during dinner preparations to pick 2 green onions and a bowl full of lettuce leaves. “On demand” vegetables, as it were – as long as the crops don’t fail.
Advantages:
- Absolutely fresh, picked-ripe produce
- Pick what you need when you need it
Disadvantages:
- Lots of time and work required (but it also counts as exercise)
- Harvests are unreliable
Of course, rather than settle on one of these methods, most people will blend them. Choose one as your primary method of acquiring vegetables, then supplement with any others that are available to you. Be aware as seasons of life as well as literal seasons make one option more viable than another.
Decluttered Kitchen Step 18: Organize Your Grocery Lists
Grocery Shopping with No Planning Required
Simplifying grocery shopping is the true benefit of having a master pantry list and a decluttered kitchen that includes everything you need to prepare all the meals in your plan. You no longer have to coordinate menu planning and grocery-list making. You will have a much easier time buying what you need if you forget your list, because you have a standard set of items you usually buy and grocery shopping for those items will eventually become routine.
So, looking at your food sources, your chosen strategies for buying meat and vegetables, your master pantry list, and your price book, make a master grocery list for each store you patronize at least monthly.
I have a master list for WinCo, Costco, WalMart (including household supplies), and then a blank list for Yoke’s, a more specialty grocery store that does often have good sale prices on vegetables, meat, and wine. Some items are on both lists. For example, we usually buy milk at Costco, but it’s the same price at WinCo, so if WinCo is where I’m headed and I need milk, it’s on that list too. For my Yoke’s list, I check their ads online and note if there are any amazing deals, then decide if it’s worth a stop that week.
At first, I tried only copying over what I did need, but then I found it was faster to copy the whole list and delete what I saw in the pantry and fridge than to look at what was there and notice what was missing. On paper, this would be printing your master list and crossing off what you don’t need (because you can see it in front of you in the pantry), leaving you with only a list of what you need to buy to replenish your stock.
This process drastically cuts down on the time and mental energy required to generate a grocery list. That’s living decluttered in your kitchen.
Step 19: Decide on Your Shopping Strategy
How often will you go grocery shopping and how will it work into your routine?
Many factors go into the decision about how often you should grocery shop. But it will simplify life and greatly decrease the mental energy and stress involved if it is a decision rather than a haphazard, “Ack, we need milk today!” affair.
There are three most common options: shopping weekly, every other week, and monthly. As always, there are advantages and disadvantages to each.
1. Weekly Grocery Shopping
Advantages:
- Easy to create a routine around a weekly errand day.
- Don’t have to buy massive amounts of anything.
- More likely to be able to make due until the next planned trip if you run out of something.
- Able to take advantage of weekly specials.
Disadvantages:
- Trips might be shorter, but they are more frequent, so possibly more time is consumed shopping.
- Seeing more specials might provide more temptations for impulse buys of items not on the pantry list.
2. Twice Monthly Grocery Shopping
Advantages:
- Less time is used shopping without the hassle of purchasing a whole month’s supply at once.
- Perishables should be consumed within around 2 weeks of purchasing, so twice monthly is an efficient timeframe.
- Makes budgeting easier if you are paid biweekly.
Disadvantages:
- Doesn’t take advantage of the weekly specials.
- Can be harder to create a routine around shopping every other week.
3. Monthly Grocery Shopping
Advantages:
- Turns grocery shopping into a less frequent project instead of a frequent routine. Get it done and forget about it for a month.
- Less likely to buy things you don’t need or that aren’t on the list; less room for temptations to buy specials that don’t fit your budget overall or your food philosophy.
Disadvantages:
- A large monthly trip can be an exhausting all-day process when you include getting home and putting everything away.
- Requires knowledge of the quantities your family goes through and flexibility in substitutions and making due if you run out of certain things.
Many families are likely to choose some combination of these strategies. For example, I currently shop weekly at WinCo but only once or twice a month at Costco. Also, different seasons of life require adapting of the grocery routine. I used to go shopping monthly (except for picking up milk as needed), but with a family of 7, and hearty appetites all around, that’s just too much at once for me to manage these days, particularly since I want to bring the kids along. So try out the various strategies, but know that they are adaptable and flexible according to your own needs and situations. All attempts at being intentional, however, will help your peace of mind in the long haul.
Step 21: Create and Maintain Inventories
Because you’re only purchasing and keeping food stuffs from your master pantry list, creating an inventory is simple. It is simply that master list in a different form. Keeping such a list makes creating the grocery list simple and efficient, requiring little to no brain power.
Whether or not a pantry inventory is necessary in your situation is a personal choice. If you don’t keep much extra stocked and have a dedicated pantry space, a glance might be all that is necessary to see your pantry stock. We only need lists to help us track when it is helpful, not simply for the sake of keeping another list.
However, if you prefer to keep a backup supply stock, emergency pantry items, or must find odd pockets of space to keep your stock, then an inventory list might be a helpful thing to keep.
I recommend writing your master pantry list on a white board, slipping a printed list into a plastic page protector or glass frame, or keeping a separate electronic note however you store those. Then, when you add to your supply, add a mark. When you pull something from supply, erase a mark. Clearly, then, this list must be handy and convenient.
Create and Keep a Freezer Inventory
A little more tricky is the freezer inventory. This is more than a matter of keeping tabs on the items only from your master list, but also includes items you’ve prepared and put up for later. The possibilities, then, of what could go in your freezer are vast. Here’s how I keep it simple:
- List items you buy and freeze like particular meat cuts, bread, frozen vegetables, and such.
- List items you often make and freeze like bread, meals, desserts, jams and sauces, beans, and such.
- Leave a blank space to write other items you end up adding to your freezer.
Keep this list electronically, in your home management binder, on a paper list taped to the freezer, or even written directly on your freezer with a wet-erase marker! Make a tally mark when you add an item and erase a tally mark when you remove an item.
Step 21: Never Run Out of Your Pantry Staples
When I first began overhauling my menu planning and pantry set-up and decluttering my kitchen, I had a dream. I was carried away with a vision of a pantry well-supplied and well-maintained, such that I never ran out of my staple items. No emergency trips to the grocery store or calls to my husband to stop on his way home. Isn’t that a wonderful dream?
I must admit, that though that has been my goal now for at least five years, I still sometimes shuffle around in the pantry, sure I had another bottle of salsa or bag of brown sugar or what-have-you tucked away, only to find I was mistaken.
Still, I know I have found the system and procedure to keep the pantry stocked and outages nonexistent or at least rare. User error (and fatigue and procrastination) makes the emergencies pop up more often, but still not too often.
Here are the key factors to a pantry that doesn’t dry up:
- Have a decided, simplified list of pantry staples and a meal plan that centers on only those ingredients. Simplified Dinners has already laid out the system and done the work for you.
- Have an organized pantry with convenient visibility so you can take inventory with minimal effort.
- Keep one extra of each non-perishable good on your master pantry list. If you have an open ketchup, mustard, lemon juice, etc., in the fridge, always keep a spare in the pantry. Make your list based on whether or not you have an extra in the pantry, not based on whether or not what you have open will last until your next trip.
- Create your grocery list based on what is missing from your stock, not based on what you plan to make for dinner or what you remember using up.
- Have a planned, regular grocery shopping schedule.
Follow these principles, particularly the third tip, and you will always have ingredients on hand to prevent urgent trips to the grocery store for emergencies.
Step 22: Set Up Your Menu Plan Calendar System
Preparing, organizing, and shopping now covered, we turn finally to the actual menu planning process.
After all the work and paring down already accomplished, menu planning really is so much simpler. With the “Simplified Dinners method,” you do not have to
- keep a running grocery list as you plan dinners
- go to the grocery store before you can make the meals you’ve planned
- plan your menu on any particular schedule
With Simplified Dinners or after going through the simple menu planning process outlined by this series, you can menu plan according to your own convenience without food-related contingencies. Your pantry stock is being resupplied on a planned schedule and you’re not running out of your master staples, and your menu options only use those preplanned items. So, you are able to pick a dinner to make from your pared down recipe options anywhere from each morning to a month or even two in advance.
Making a plan and having one in place does bring peace of mind and stability, even if the grocery shopping is not dependent on it or the dinners aren’t continent upon the grocery shopping. So, it is still a good practice that keeps the household routine smooth and less stressful.
There are several ways to keep a menu plan; they are all equally valid and work just fine – so long as you work them. Experiment and pick the one that works best with your situation and your style.
- Paper Calendar: The standard menu planning method is to write your dinner plan on a calendar, usually a blank template. You can’t really go wrong with this method, unless your paper gets lost or ruined, and you can possibly even recycle plans on a monthly or seasonal or yearly basis.
- Paper List: Instead of assigning certain meals to certain days, you instead can simply list meals you want to make in the next week or whatever span you decide to plan for. Then each morning or afternoon (if a meal doesn’t require soaking beans or thawing meat), pick which meal appeals the most or is most convenient that day.
- Digital Calendar: I use Google Calendar to keep my menu plan. It has the fun feature of being able to share calendars, so I have shared it with my husband (who uses Google Calendar at work) and with a couple friends (it’s one way to share meal ideas!). With a digital calendar, there is also the convenience of setting some meals to repeat at designated intervals or on certain dates. Additionally, if plans change, it’s easy to drag and drop meals to different dates.
- App: There’s always an app promising to simplify your life and keep your information at hand. If that’s your thing, then I’m sure there are lots of options to try out. Beware, however, that using an app generally means the information is only on your phone and not available if the battery dies or you lose it.
Step 23: Pick a Kitchen Day & Kitchen Tasks
Particularly if we are thinking about all our family’s meals and not just dinner, and we are committed to frugal whole foods (at least for the most part), then it makes sense to add a kitchen day to your weekly routine. A kitchen day is a few hours a week set aside to food preparation. Here are some of the projects I tackle on my own kitchen days (usually Saturdays):
- granola for the week or other breakfast item (like muffins) to stick in the freezer
- any beans needed for dinners that week cooked in advance
- sandwich bread or other lunch item (pretzel bites, flatbread, etc.)
- Sunday’s food prep (so Sunday is as much of a day off as possible)
- vegetable or salad prep (for lunch raw veggies and dinner or lunch salads)
Getting some of the food prep done in advance helps immensely during busy weekdays.
With a weekly kitchen time
- efficiency is achieved through scale by making bigger batches
- clean-up time is reduced as you clean up once after multiple cooking tasks
- you are able to make some “convenience” foods available for your use on more hectic days
- its easier to eat more homemade foods and be less tempted by premade packaged foods
What cooking jobs would make your life easier during the week? Set aside a time for them, knock them out at a fell swoop, clean once, and enjoy the fruits of your efforts later in the week!
Step 24: Add Menu Planning to Your Task List
Menu planning is one of those tasks, like all cooking tasks, that is never accomplished once and for all. So, after deciding on the frequency of menu planning that works best for you, you should add the task to your daily, weekly, or monthly task list.
Keeping a list with recurring tasks like menu planning helps remove the job from the nagging, pestering, back-of-the-mind category and makes it happen with regularity without you having to spend the mental effort to remember or make it routine. If working from your list is routine, then you don’t have to let each little task bounce around inside your mind, coming to mind only at inconvenient times.
Decluttered Kitchen Step 25: Make Checking Your Menu Plan a Habit
Checking your menu plan is an important part of keeping that menu plan you took the time to make. Without checking it, it will not help prevent frequent last-minute dinner emergencies.
There are several ways to make checking your menu plan easy and habitual:
- Keep your written plan in a place you often refer to anyway. If you don’t have such a spot, you might have to create one. But keeping your menu plan in a place you will often and easily see it is key to making it useful. There are several options:
- Keep it on your daily or digital calendar. I keep mine on my Google calendar, which I look at first thing in the morning, last thing in the evening, and multiple times throughout the day.
- Keep it in your home management binder.
- Keep it posted on the fridge or some other prominent place in your kitchen.
- Make it a habit to check it first thing in the morning. It helps if you already have the habit of checking your calendar and to-do lists at the beginning of the day.
- Make it a habit to check it every evening. While you want to check your menu plan in the morning to get a feel for your day, you also want to check it in the evening to see if there is anything you need to prepare like soaking beans or pulling meat out of the freezer. While there are techniques for shortcutting these things, which we will discuss on later days, it’s best to be prepared beforehand and ready in the morning for the day’s business, including dinner.
If you not only write down your menu plan, but look at it so you can work off of it daily, you will derive the full benefit of taking the time to menu plan.