There’s no denying it. Homeschooling comes with a lot of stuff. The papers, pencils, supplies, and books threaten to take over every square inch – and yet can never be found when they’re needed.
So we look to organization to solve our woes, but the methods of the magazines will not help our homeschooling households. We need guerrilla organization, organization that can withstand the daily heavy use of children.
The kind of organization tips and hacks that work for homeschooling households are those that look at when and where each thing needs to be used and minimizes the amount of effort it takes to keep up with the systems.
Real life homeschool organization needs to be simple, easy, and straightforward. Here’s how to accomplish that.

Homeschool Hack # 1 – A Quick & Easy Fix for Worn and Torn Books
We have a lot of books at our house. I did pass up the 1,000 mark last year. I love my books, and I’m not the only one in the house who does, much to my delight.
However, a lot of book love can leave the books looking rather sad and perhaps even render them useless. And, there is no myth for books about being so well loved that they become real, unfortunately. They simply end up as compostable waste.
I’ve spent time pondering and searching and talking about “book binder’s tape” or contact paper covering (my dad was religious in in application of contact paper to all paperbacks that entered the house). But I don’t have the eye or hand or stamina for non-bubbly, straight, crisp application of contact paper. Not to mention the fact that it simply wouldn’t happen in real life.
No, I needed something faster and simpler and more manageable. After all, my stack of books-needing-repairs was getting quite high, and there were more that really should have been in it.
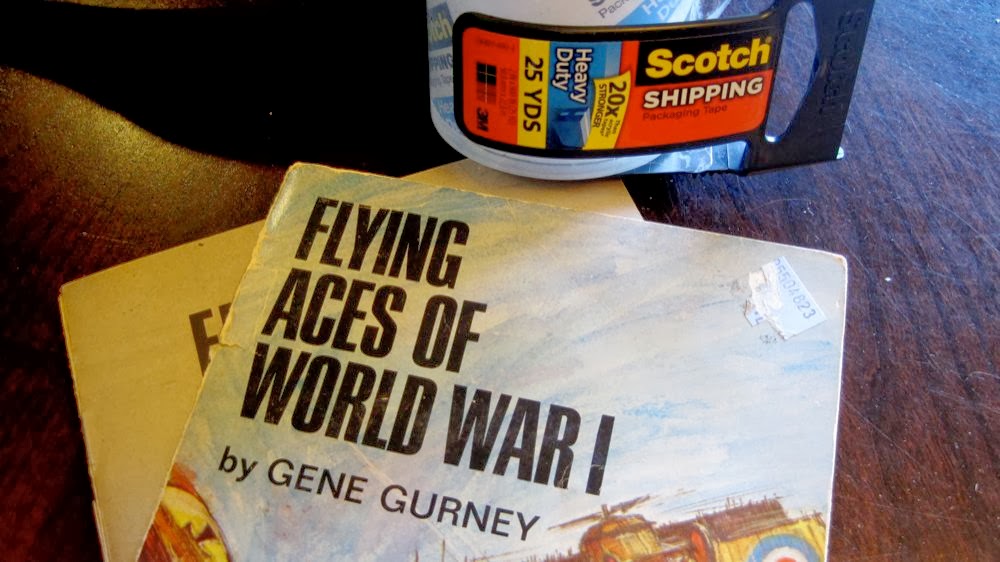
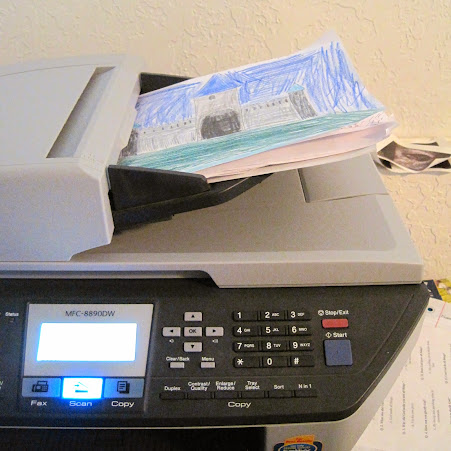
I don’t remember for sure when or how I connected the dots, but it might have been in the tape aisle of WalMart. I was buying packing tape refills and I remembered to scour the display for a mythical product I had heard tell of called “book binder’s tape” that, supposedly, libraries use. There was no such thing there. However, as I frowned and just grabbed the packing tape refill, I realized, “Well, wouldn’t packing tape do?” Actually, I was sure it would definitely be good enough for me. It would get the job done, and that was better than my – and my books’ – current state.
So, I grabbed a small dispenser especially for the purpose. It now lives in my teacher bag.
So, I apply a length of heavy-duty packing tape around the binding edge of the children’s books to reinforce them and to fix any tears and wearing away. Most of the books I get them are used and start out already worn. This keeps them in action much longer and stronger. Doing the same thing with a little more care and a strip on the inside of the cover can also replace a torn or worn off cover.
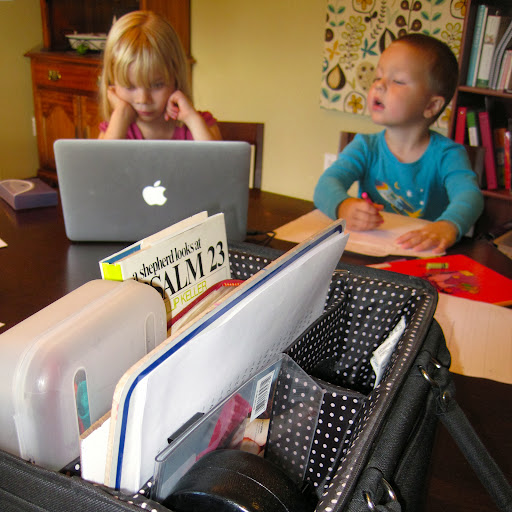
My current simple book organizing method is to keep a basket for picture books, the books I have selected to be read for the school year (plus things like Childcraft, anthologies of fairy tales, our Eyewitness collection, and others) are on the lower shelves of the living room (where they are more likely to be seen and grabbed), and the boys’ free-reading, entertaining chapter books (sh, the biographies are included with those) are on the bookshelf in their room. To keep things manageable and some of the content fresh(er), I decided to split the history(ish) (excluding some of our biography collections) books into our three stages (Ancient, Medieval, Modern), and box up the year we’re not currently “in.”
To help keep those books I had decided counted as books to rotate, I put a cheap Avery sticker on their spines: yellow for ancient, orange for medieval, and green for modern.
Perfect!
Except that they come off during the aforementioned well-loving.
However, a strip of packing tape over the edges reinforces the cover and spine and also keeps the label on.
So, I have to be careful to get the sticker at a consistent height, so my own bookshelf doesn’t drive me insane.
P.S. NO. I do not malign vintage hardbacks with fluorescent stickers. Set your mind at ease.
Packing tape for book repair is my best homeschool fix-it solution I have to share! I hope it revolutionizes your book collection as it did mine.
And now I’m kinda hoping everyone else didn’t already know and do this, but I had to make it hard and reinvent common sense to get my answer. But, even so: packing tape. It is now my best friend.
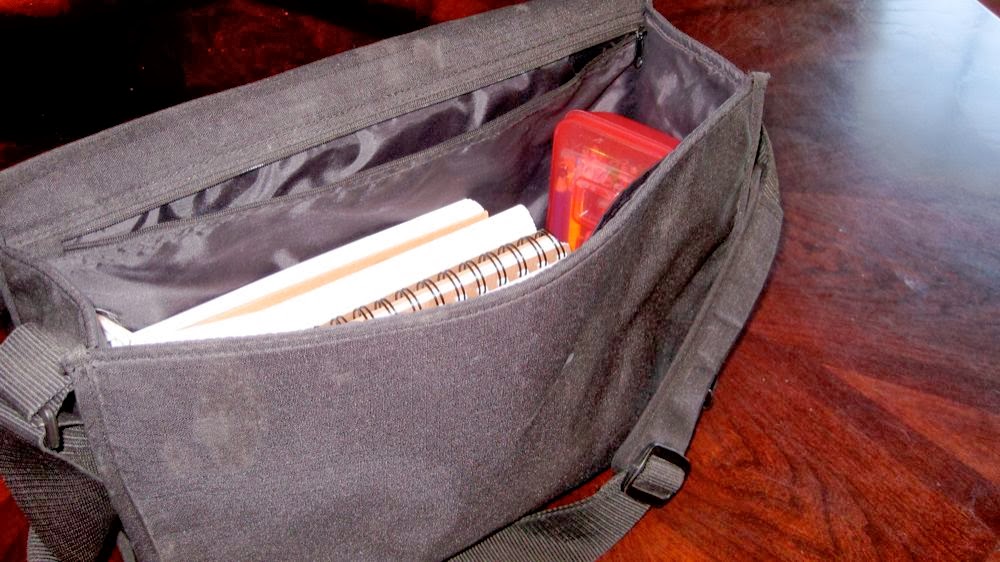
Homeschool Hack #2 – Our Nature Walk Art Bag
Now, nature walks never happen as often as I plan or as I’d like. But, I still like the keep the nature walk art bag, ready to grab and go, on the top shelf of our coat closet, just in case.
It’s pretty simple, really. It has a small art book for each of the kids and a box of colored and regular pencils for each, as well, with a manual pencil sharpener. The pocket in the flap is where the pocket field guides, so we can pretend we know what we’re doing.
- Type of container: Old IKEA messenger bag
- Contents:
- Small notebook for each child
- Pencils in a box for each child
- Field guides that I got for 25c each at library sales
I like this set up because if we actually manage to arrange an outing and get everyone out the door,
then there is not that additional barrier or time-eater of gathering supplies. We grab the bag and we have what we need.
There have even been times when I just let the bag live in the car. Then, I don’t even have to remember to grab it. I think for awhile I thought nature walks might happen spontaneously while we were out, but that never actually worked.
The simple secret is that the best kind of organizing is simply putting supplies in a container so you have them when you need them. It doesn’t have to be fancier or prettier than that.
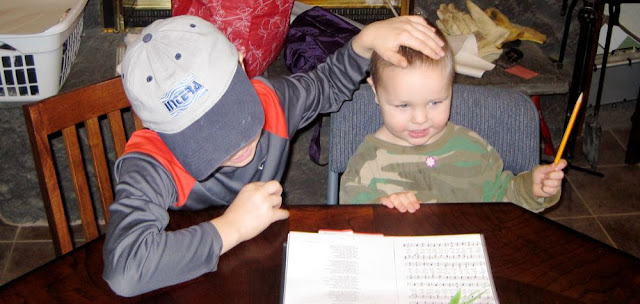
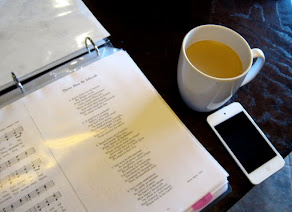
Homeschool Hack #3 – Our Circle Time Binders
Simply Charlotte Mason’s Scripture memory system is a popular resource for a reason. It’s a great way to organize your memory work not only to learn it by repetition, but also to retain it by repetition. It’s so easy for previously learned work to fall by the wayside because it isn’t reviewed. And, as John Milton Gregory writes in The Seven Laws of Teaching, “No time is wasted, which is spent in review.”
Rather than use index cards and boxes, I made up a binder with a similar set up for our Circle Time. Well, I made up 4 binders. One for me, and one for each reader (or, soon-to-be reader who wants to follow along).
Is putting the words we are memorizing in front of the readers “cheating”? It is accessing a different sort of memory than having to learn strictly through oral repetition, but I’m ok with that.
My readers are not getting the skill of careful listening and duplicating nor of precise rote memorization. But they are gaining skills in inflected, well-articulated reading and in fluent hearing, reading, and understanding long paragraphs of good, strong English (without it being broken up by phrase or sentence). Every day or once a week, we hear the same Psalms over and over, and the phrases flow over us, softening and shaping. Every day or once a week, we say aloud the same New Testament paragraphs, not separating the application verses from the doctrine or doxology verses, but letting the whole connected thought pound its way in day after day.
What a great way to start a school day.
- Type of container: Staples’ “Better Binders“
- Organizing materials: Printed paper in page protectors & adhesive tabs to mark sections
- Contents:
I like this set up because
- It has reduced friction and battle-of-wills between my sons and I.
- It makes it easier and smoother to work on entire chapters of Scripture at a time.
- It helps the flow of Circle Time continue even if I am distracted by or absent because of babies or toddlers.
- I believe it is helping my readers’ spelling naturally and visually, as they both say and see hundreds of words daily. We don’t do spelling as a separate subject, and they have few misspelled words when they write.
- I love hearing the 3-year-old use phrases from Psalms or the catechism and tunes from hymns in his playing.
- I think slowly reading through a large chunk of Scripture, or a poem, or a beautifully written catechism answer (the Heidelberg is beautiful while also being succinct; I love it) is a great way to meditate on things that are lovely. Circle Time is for myself as well as the children. Even if I end up missing my own personal devotions in the morning, we spend an hour together praying, singing, reading together 2 Psalms, a chapter of Ephesians, and 2-3 other shorter paragraphs of Scripture, as well as reading grounding, comforting catechism answers.
Each family’s Circle Time is going to reflect its own personality and culture. Don’t worry about following anyone else’s plan to a T, but take what is helpful and useful for your family and just set aside the time to sing and memorize and read together, whether it is little bits or a full hour or more.
Learn more: Our Classical Morning Time
Homeschool Hack #4 – Organizing Coloring Books
I absolutely love the Dover coloring books. The line drawings are artistic and beautiful, and they have coloring books for every school subject, every time period, and almost every interest. The paper is heavy and the quality is excellent.
Ok, yes, I’m cheap. But even at $3-5 each I don’t want to hand over the book to my 5-year-old and say, “Consume away!” I copy (with my printer/copier/duplex laser printer I love) the pages I wanted to use for school or for coloring time. Besides, then I can continue to collect new books rather than replacing consumed books. However, the copyright permissions in each book was not quite clear if this was permitted. The permissions granted were generous, but it didn’t clearly state that making continuous copies (for our own family use only) was ok. I read article after article online about copyright permissions, especially as pertained to homeschool education use and found the novel idea of simply asking for permission. I did so, via Dover’s website, and within an hour received an email back granting me permission “of course” to make copies for my family.
So, with a growing collection of coloring books, clearly I need an organized set up so I can actually find what I want when I need it. Here’s what I’ve done:
We have an ugly, tall filing cabinet in our office right next to the printer/copier. Perfect place! One drawer in this cabinet is for our coloring books. For each coloring book, I have a green hanging file folder, with the name of the book written on the tab. I put all the tabs in the far left place, so they’re all in a row and adding a new one in the middle doesn’t mess up a staggered system. I file them in modified alphabetical order.
On the tab, before the title of the book, I write an initial that categorizes the book:
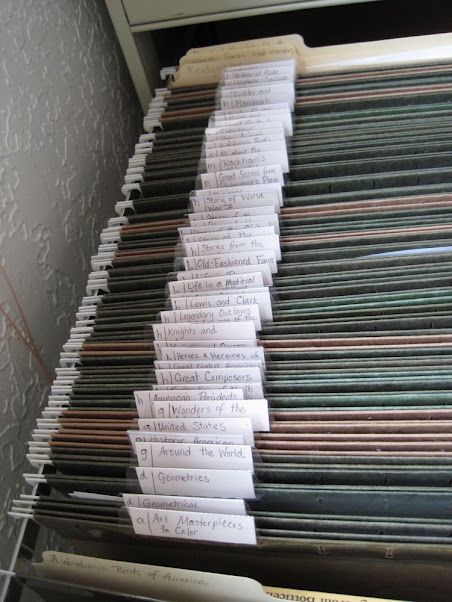
- A – art (including literature, like Famous Scenes from Shakespeare)
- D – designs (we all like the Geometric Designs to Color books)
- G – geography
- H – history
- N – nature
- T – technology (this is where the “historic sailing ships” and “history of flight” and “trucks” books go)
Then, to make copying easier, I also undo the staples on the coloring book and cut the edges of the pages so they lay flat. This way I can grab a sheet or two, lay them on the printer feeder, push “4,” and have 4 double-sided coloring pages quickly and efficiently.
This set up makes it easy to get relevant coloring pages. If it weren’t so easy, I probably wouldn’t do it nearly so often.
Homeschool Hack #5 – Schooling Year-Round
Yes, we are those sorts of homeschoolers who school year-round. It seems like people interpret this to mean we are always school, school, school. The truth is that I school year-round so I can have more of a break, not less. I think that having solid school weeks from January until April would require me to take antidepressants, or maybe just turn to rum – at 10am. No one wants either.
Ideally, I’d actually sorta sometimes enjoy this life with my little people, and so we keep a year-round schedule. That is, we school for six weeks, then take a week off. We take a week off for Thanksgiving. We take three weeks off for Christmas. We take off two weeks in February, which is the best antidote for the February Blues. We take off the month of June. Sure, we’re doing school in July, but we’ve had numerous vacation weeks while everyone else is in school – which is also nice, because we have the stores, the park, the zoo at their uncrowded times that way.
A break week every six weeks allows me to catch up on the entropy that is inevitable around the house or get to that project that I wish I had time for. Yes, it really is an “or,” not an “and,” I’ve had to admit to myself lately. We had a break week last week and my husband took the Tuesday off and we went for a day trip to the zoo in the big city a few hours away. It was fun.
Six-week chunks are good for memorizing Psalms, passages, poems, and hymns. I swap out Circle Time binder pages during break week, so every six weeks we get new stuff, which helps infuse more energy and excitement into that time.
I’ve already written about how I plan and organize our year-round schedule, so for more, I’ll just send you there. The planning series is still good, and was a lifesaver last year with a new baby, but this year I’m much more minimalist with the all-ahead-of-time copying.
Learn more: The Secret to Year-Round Homeschooling
I am very much impressed by the people who regularly set aside time daily, weekly, or even monthly to get their school stuff in order and laid out. As a planner, it seems like I should be able to do the same. However, I have come to grips that I am an administrator, a big-picture thinker, and a synthesizer/creator/planner, but not a task- and detail-oriented person. I can make an amazing, beautiful checklist that incorporates all the right things in just the right way, but I balk at using them. I jump into big, oversized projects with zest, but don’t keep my eyes on the ball to follow through on the daily repetitive necessities.
So, for me, a huge do-it-all-at-once planning and organizing process fits best. I make our plan for the year, print and file papers, ready books, and layout the plans before we begin. However, I don’t keep track of “attendance,” or grades. I am apt to forgo the plan if the boys are caught up in a book or topic or project that is in keeping with my goals but not done in the manner or at the pace I had anticipated. I don’t care about “making up time” or finishing books by the end of the year.
For more on my laid-back approach to lesson plans and school year plans, see my “Without Lesson Plans” posts:
- Low-Key Science, without lesson plans
- History Without Lesson Plans for Early Elementary
- Geography Without Lesson Plans
- Teaching Writing Without Lesson Plans
Schooling “year-round” enables us to get more rest and refreshment throughout the year. It’s about managing energy & effectiveness, not putting in more time and checking off more boxes.
Homeschool Hack #6 – Use Google Calendar for Homeschooling
Keeping a current calendar is vital to being organized. The advantage of keeping that calendar in a web-based form like Google calendar rather than a wall calendar is not only that you have an up-to-date synced copy on all your systems, but also that you can add repeating events with a few extra clicks instead of writing it out repeatedly. Moreover, you can change the date or time of an event by dragging it over instead of erasing and rewriting. This is particularly handy if you keep your menu plan on your calendar, but also useful for school events.
I have tried both not adding school times to the calendar and made multiple attempts at doing so. Currently I am keeping an hour-long “Circle Time” appointment, math, Latin, phonics, and our lesson swap times, plus appointments like our speech class, writing class, piano lessons, kids’ book club, and nature study with friends. Having our everyday school activities taking up the day’s space helps me see the day as booked, and have to consciously move things around or delete them when things like doctor’s appointments or other get-together opportunities arise.
Your calendar is only going to be helpful if you can trust it. That means not only leaving out the wishful thinking but also including all your actual commitments. You should be able to look at your calendar and see what you have going on without also tracking or worrying about events not there.
Homeschooling days often are a weird combination of obligation and wishful thinking. Right now, though, seeing my time as committed to homeschooling has helped me move from the everything-is-gravy early years into the now-we-might-need-to-get-serious years.
Play around with different set-ups, and don’t be afraid to jettison a practice if it doesn’t serve you. And, don’t hesitate to try again when circumstances are different.
Homeschool Hack #7 – Evernote for Homeschool Planning
So, you can find all sorts of Pinterest-linked blog posts about cute homeschool planning printables. They work for some, but not for me. I know digital doesn’t work for everyone, either, but it might be worth trying.
Rather than a paper-filled binder, I keep my planning “pages” as notes in Evernote. In previous years, the only planning page (that doubled as a record) was my year overview page. Now that I’m into fifth grade, I’m trying to do better about note-taking as we go along to find my groove and make it a habit before we get into the grades where record-keeping is important.
So in addition to my note with the year’s overview, I have been making a weekly planning note in Evernote. It starts out as the plan, with what should happen each day, and as I take notes through the week, it becomes the record of what actually happens. And I try not to let the disparity get to me.
Or, at least, that’s the idea. I’m usually playing catch-up on the previous week’s note, but then when it’s finished I click a button and email it to my husband, so he has an objective idea of what’s happening and not just my biased run-down of the day.
I keep my writing class lesson plans, with all the sentences and homework assignments and anything else I generate captured in an Evernote notebook. So, when I do this class again in 4 years or so, I won’t have to reinvent this wheel. After all, I’ll be reinventing the ninth grade wheel, which will be quite enough, thank you.
- Type of container: Laptop
- Organizing materials: Evernote
- Contents:
- Every single piece of information I need or want to keep track of
I like this set up because
- I always know where the information I need is.
- The information is searchable.
- The information is available on the ‘net, so I can access it from other computers or my iPod Touch if I need or want to.
- I just like it.
Being organized means making it work for you, not you for it. If it makes your life harder rather than easier, that’s not organized. This is how I do it, but you should decide what will work best for you, in your situation, with your stuff, with your personality.
Homeschool Hack #8 – Preschool/Kindergarten Bin
So, I like keeping books in bins.
I keep the books I use with my 3-year-old and 5-year-old together in a bin, so I can grab them when the stars align and we can take 30 minutes on the couch together.
That’s it. Nothing fancy. Nothing special. Reading the books in our bin, plus a picture book of the children’s choice is our preschool/kindergarten school time, apart from Circle Time and math time and as much open-ended play as I can encourage, preferably out of doors.
- Type of container: Sterilite bin
- Contents:
For more on preschool and kindergarten, check out
- Preschool & Kindergarten Philosophy
- Looking Back: What I Wish I’d Known About Homeschooling in the Early Years – by Brandy Vencel
- Teaching a Child to Walk, to Use the Bathroom, and to Read
My Bin for Teacher Manuals
Ok, this is my last file box of books, I promise.
I keep the math and Latin teacher manuals – that is, the answer keys – in a file bin.
The file bin is lidded.
The file bin is up high.
The file bin is in a high traffic area of the house.
This is because I believe in helping my students flee temptation. I know from personal experience how easy it is to self-justify and excuse “checking” one’s work before it’s actually done.
So the temptation is not impossible to reach, but it would take many laborious steps that would have to be strategically taken, meaning it would not be possible to find oneself “accidentally” looking at the answers.
Additionally, these extra barriers help me keep my own mind sharp by doing as much checking as possible without the answer key. I am much better at all my facts now that I’ve done first, second, and third grade twice. My math is improving and I can almost always check their math without the answer key. Since I am also trying to learn Latin along with my children, I’ve used our Latin reference to figure out answers I’m unsure of rather than pull out the manual. I try to keep my mind engaged with math and Latin to keep sharp and to keep up.
- Type of container: File Bin
- Contents:
Being organized is about being prepared and having a place for everything. It is not about everything being match-matchy or color-coded or painted with chalkboard paint.
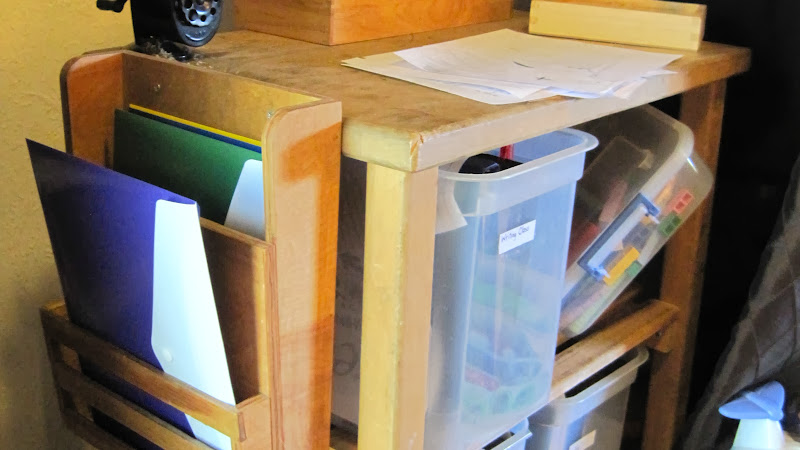
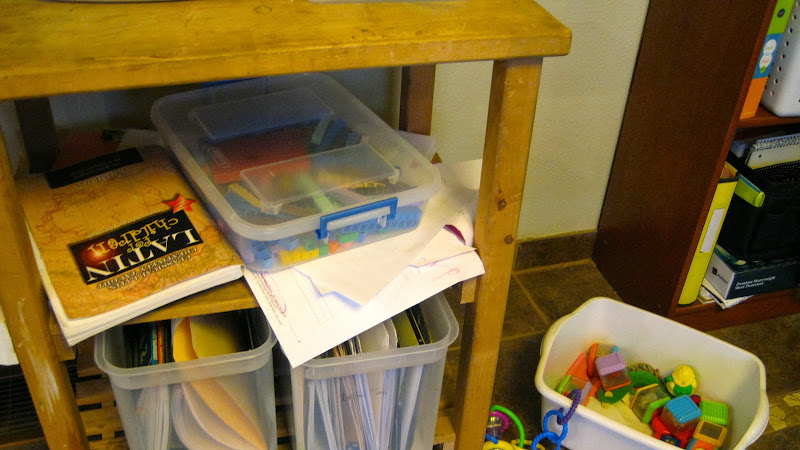
Homeschool Hack #9 – Our File Box for Elementary Lessons
Just like I have the math stuff all put together in a portable crate, ready to pull out when we all sit around the table for math time together, I put all the books and papers we need for our elementary lessons with the older kids together.
I use a Sterilite file box for this, partly because I really like them. I think they are the perfect size. I figure if what I want to do doesn’t fit into this box, I’m probably planning too much and need to cut back. :)
During our twice-weekly afternoon lesson time with the big kids – the elementary-aged kids – we do Young Peacemaker, Covenantal Catechism for Bible, Story of the Middle Ages with coloring pages and a Book of Centuries for history, and A Child’s Geography: Exploring His Earth for Geography/Earth Science (with coloring pages, drawing, and written narration, but no experiments). Sometimes we do an artist study, but that’s with a library book from the library bin. And next term we’ll swap Geography for some Shakespeare!
- Type of container: File bin
- Organizing materials: Hanging files
- Contents:
- One hanging file per lesson type
- In each hanging file is the book and a manila folder with any papers or coloring pages needed
I like this set up because
- I can grab it (and my teacher tote) and have everything I need to start. Getting stuff ready, then, doesn’t take thought or effort.
- It is a visual, physical limit for what we’ll spend our afternoon doing.
- It fits on the kitchen cart home.
So often getting started is the biggest challenge. Setting things up so it’s easy to say, “Let’s go!” is a helpful thing to do!
Homeschool Hack #10 – Math Crate
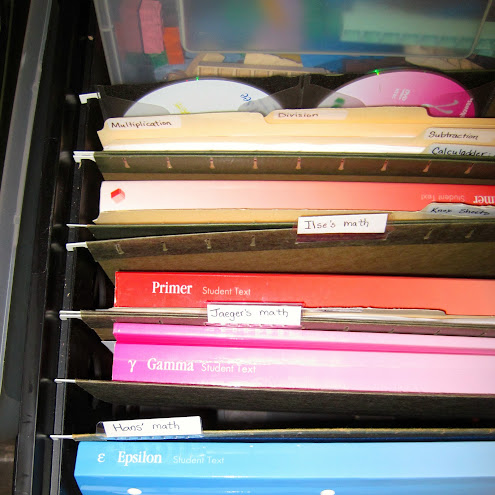
This year I set up bins for each “time” we have, so I can grab the bin and have what we need for the business at hand. The one that probably saves me the most time is the math crate.
Anyway, the math bin lives on the hearth with easy access, right by the table where we do math (which is not the breakfast table, so that we don’t have to wait if that chore is delayed), when it is not put away on the kitchen cart (which it is usually only on weekends). I have a hanging folder for each student (which includes the 3-year-old, because he often asks to do math, too, and so needs something that looks close enough to make him happy). In the hanging folder is the math workbook (I tear out the page they are assigned daily; then it’s thrown away when they’re done, so the crate gets lighter and lighter every day) and a folder with any extra fact drill page I might want to assign. Then I have another hanging file that has a folder with Calculadder worksheets I already have printed (most of them extra from last year, where we did a lot of fact review with them on my low-energy days). I have them separated out by math type: a folder of addition, a folder for subtraction, one with multiplication, etc. This hanging folder also contains the handy-dandy lesson DVD storage sleeves.
This crate does not contain the teacher manuals or any answer keys. It sits out and available all day, and I have decided to simply remove that temptation. More on teacher manuals later.
- Type of container: Cheap crate
- Organizing materials: Hanging folders & manila folders
- Contents:
I like this set up because
- everything we need during our math time is at hand.
- it’s quick and easy to put the books back where they belong.
- math drills are convenient, and therefore easy to whip out to assign.
Being organized is about being prepared and having a place for everything. It is not about everything being match-matchy or color-coded or painted with chalkboard paint.
Homeschool Hack #11 – Reserve Crayons for Math-U-See Primer & Alpha
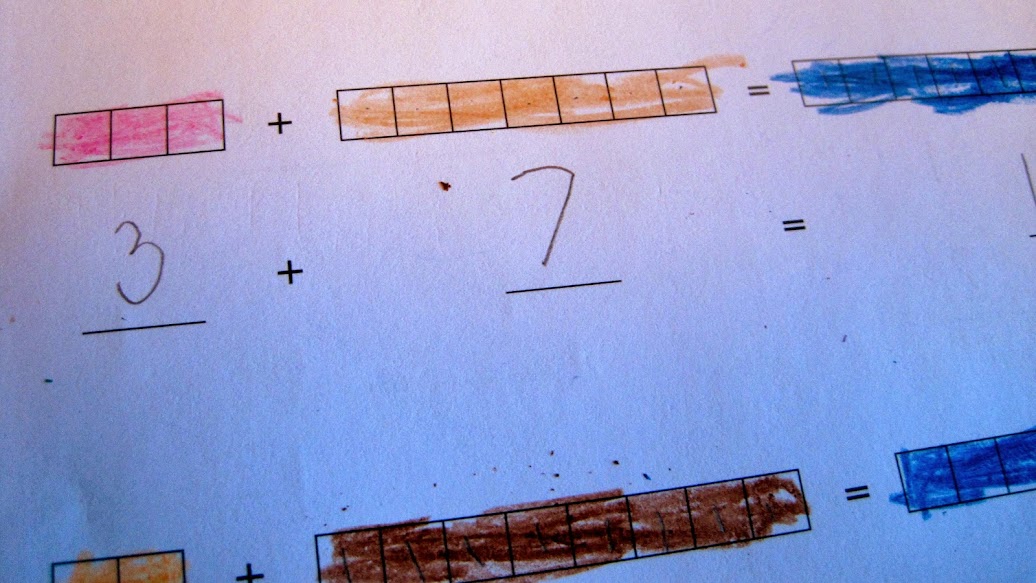
Ok, so this is easy and quick, but it’s one of those little things that just makes life smoother and simpler and nicer. I’m on my third time around in MUS Alpha, now, and I’ve finally acted upon that little nagging idea that begins with “I really should just…”
Instead of saying it again, I just did it.
In Primer & Alpha, there are multiple lessons (and a lesson generally lasts an average of a week) that ask the student to color in the pictures of the blocks the right color.
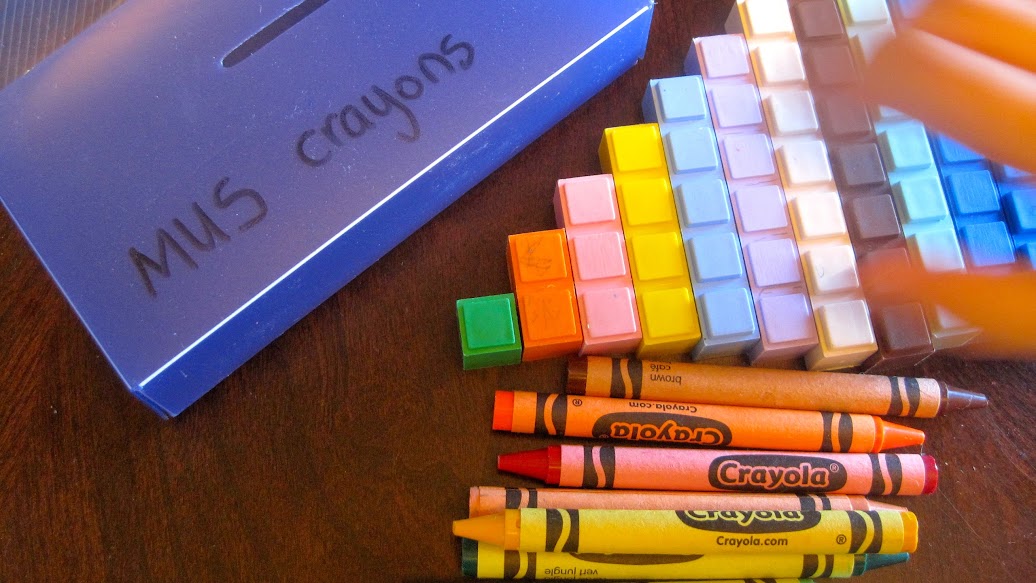
And, in previous years, I had pencil and crayon issues to start with, so then opening the book and realizing that right now, this instant, I needed the crayons to approximate the colors of the MUS unit blocks was just a headache and a temptation to close the book and say, “Let’s not do math today.”
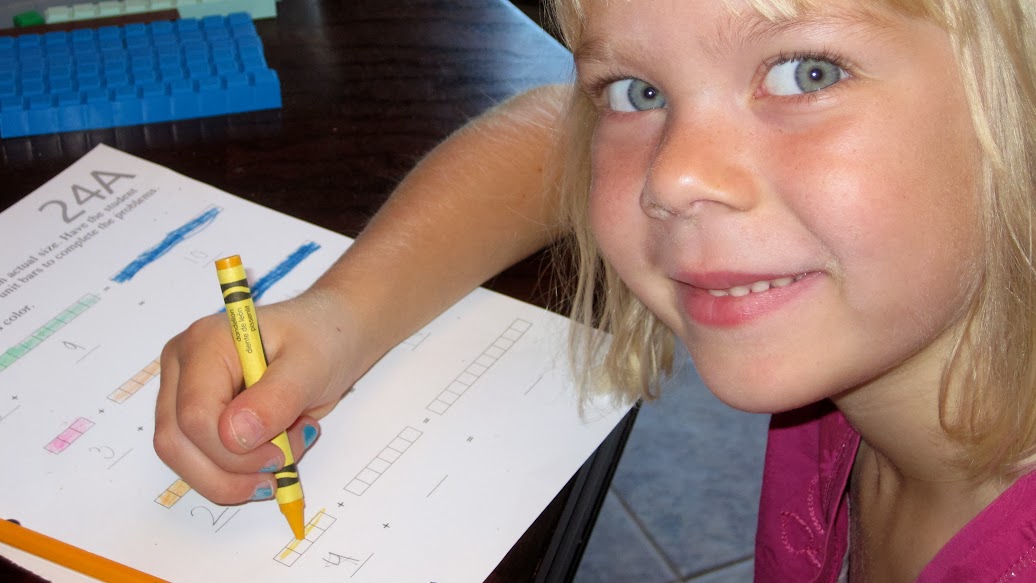
This year, knowing this was approaching, when I opened the new crayon box and emptied it into its container, I pulled out the colors that best matched the manipulatives and put them into a small index card holder (just because it was the smallest container that would hold them that I already had unused on hand). Those now go into the math bin.
Sometimes it’s the little things that just make life feel more manageable.
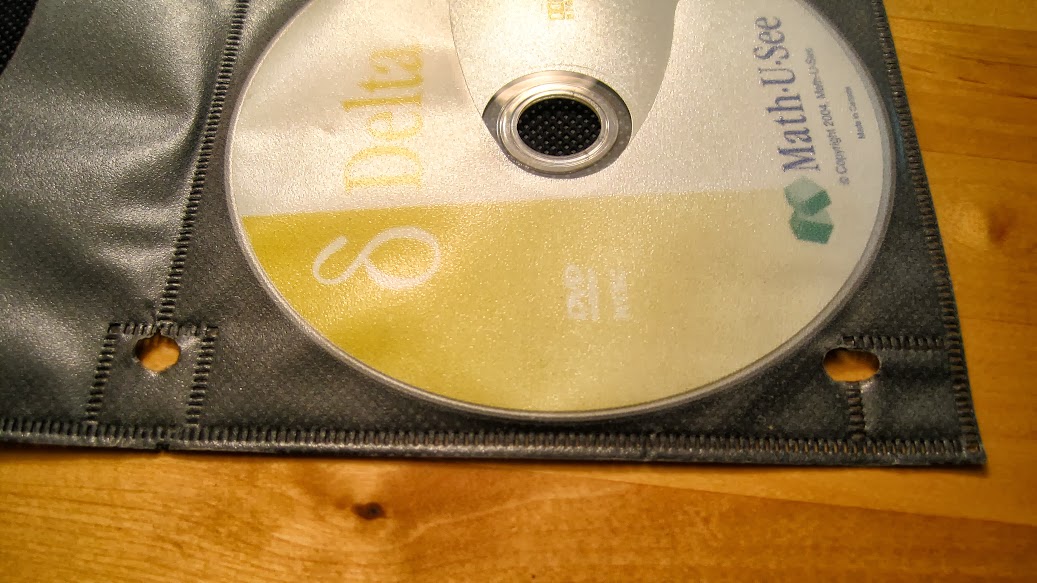
Homeschool Hack #12 – Keep Lesson DVDs Handy
We use DVD instruction for math – Math-U-See – and Latin – Latin for Children. I know I’m incorrigibly lazy, but still I simply cannot consistently keep the DVDs in their cases and the cases in their right spot. Well, really, the trouble seems to be putting the DVD away, right away, into the correct case. I wish I could blame the children for this lapse, but the fault is pretty much completely my own. The first week of school in the summer and in January, I can make myself be good. I can hover by the lesson, eject the DVD, and put it back into its case, and put the case away. Then, one day I don’t get the DVD out right away. So, the next day, when a different DVD needs to go in, I now have a DVD in hand that I had forgotten about. I end up either just setting it down outside a case (I know! It’s terrible!) “for now” (i.e. until we need it again and I have to go find it by turning over all the randomly placed DVDs that are upside down around my desk area) or I put it into the case of the DVD I am now inserting. And then what happens to that DVD when it comes out? The same process, over and over, until, when I can’t find a DVD I must resort to both hunting for DVDs around my book piles (while berating myself that I am ruining them) and having to look in every DVD case we own, because it could be anywhere.
Drives me crazy.
So, now I suppose it’s clear why I like iPods and digital music, eh? Just thinking about using CDs gives me a tension headache.
Last year I tried a portable-sized basket for all the cases we’re using so that the right one is handy. That should have worked. But, no, turns out that opening a case, taking out a DVD from the drive, putting in the needed DVD, then opening up the right case and putting the previous DVD away, and keeping all the cases put back into the nice basket was simply too many steps, too much to track, too fastidious for me. It might have been pinnable (the basket was cute! It looked organized!), but it just didn’t work for me.
So, this year, I decided I was going to conquer this problem. After all, the number of DVDs in use are only on the increase at this point! 3 instead of 2 math books and 2 instead of 1 Latin levels. It was going to get insane. I figured my choices were 1) figure out something totally unconventional that did not require multiple openings and closings or 2) change my personality.
I opted for the first choice.
I cast about my house, my mind, and the office supply store. I tried out a few ideas. And, by George, I think I got it.

In each crate (which I’ll get to next week) that needs DVDs, I simply put a CD-holder binder insert. I had a 3-ring binder with a bunch of conference CDs I’d bought a few years ago. Of course, I uploaded them all into iTunes and didn’t really need the CDs tidily organized anymore. So I took out one of those inserts, emptied it of the CDs, and stuck it in a hanging file in the appropriate crate. Now I can slip DVDs in and out quickly and easily.
It’s been 11 weeks, not 1, and this solution is still working smoothly. No more DVDs laying around who-knows-where, shiny-side-up, waiting to be ruined.
- Type of container: Hanging folder
- Organizing materials: DVD sleeves for a 3-ring binder
- Contents:
- In the math crate: Math-U-See Lesson DVDs
- In the Latin crate: Latin for Children Lesson DVDs
- In the Elementary Lessons crate: Blank World Maps and Timeline Figures CDs
More on the crates coming soon.
I like this set up because
- The number of steps required to get out and put away the DVDs is greatly reduced.
- The DVDs are kept near their related lesson books. So, when I pull out the bin, I have everything I need.
- I didn’t even have to buy anything new. I used what I had.
Perhaps I’m reinforcing the negative side of my personality, but I am still pretty tickled about my Simplified DVD Storage solution!
Homeschool Hack #13 – File by Garbage Can
So, I’ve already shared about how to file papers digitally, and how I narrow that “keep” pile down.
Here is the second, and really the most important, part of the paper solution for sanity in a homeschooling house:
Throw it away.
As soon as possible.
Really.
It’s served its purpose and can now be done away with.
- Type of container: Trash can
- Organizing materials: Garbage bag
- Contents:
- Eventually, all papers; the sooner they get in there, the better.
I like this set up because
- there is less clutter in my house.
- there is less garbage in my house.
- there is less stuff in my house.
It might not be as pretty as most of the “solutions” you’ll find on Pinterest, but it’s practical and real.
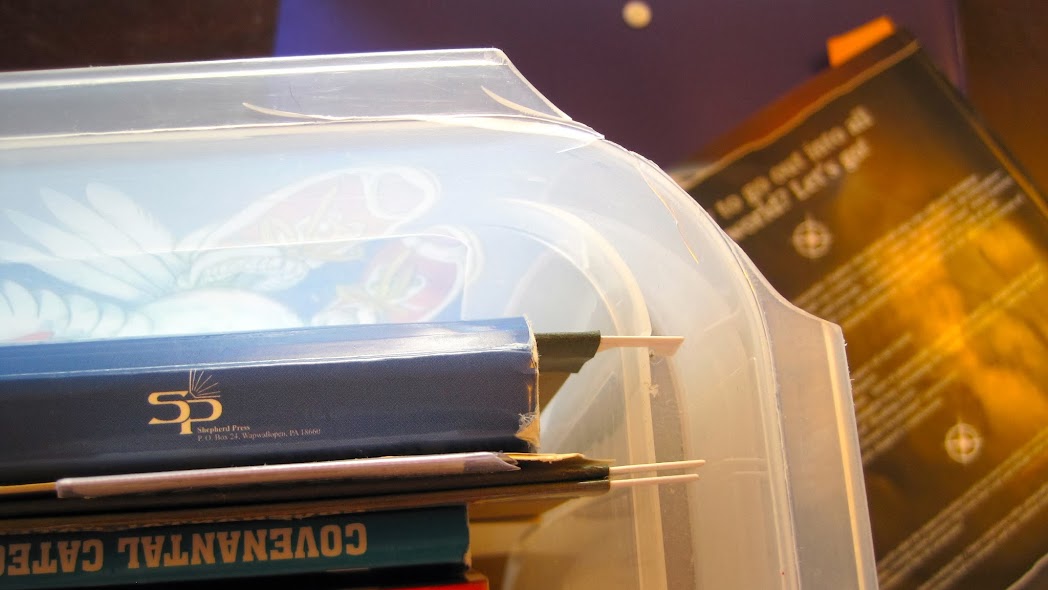
Homeschool Hack #14 – Containers will crack. We will crack. It’s still workable.
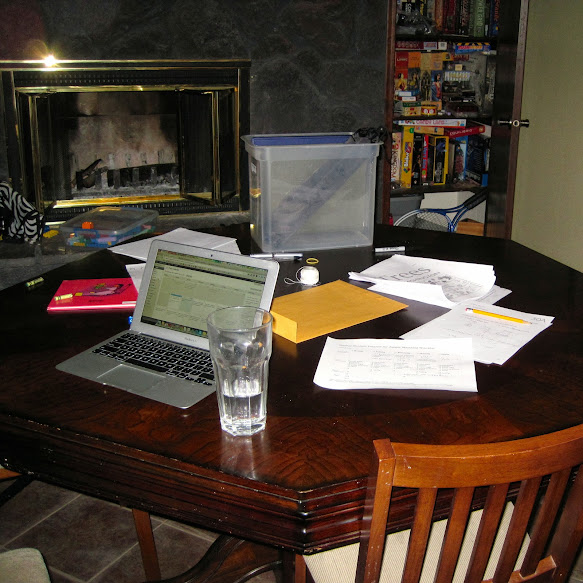
So, as I was busy living life last week, receiving my own posts by email each morning, there was more than once that I just had to laugh. And, yes, there might have been a time or two where I even felt like crying. Talk about “real life organized” not being pretty. That much, at least, is accurate around here.
In the interests of full disclosure, then, I thought I’d share some pictures of what “organized” looks like in the day to day. If anything is not Pinterest-worthy, it’s our day-to-day.
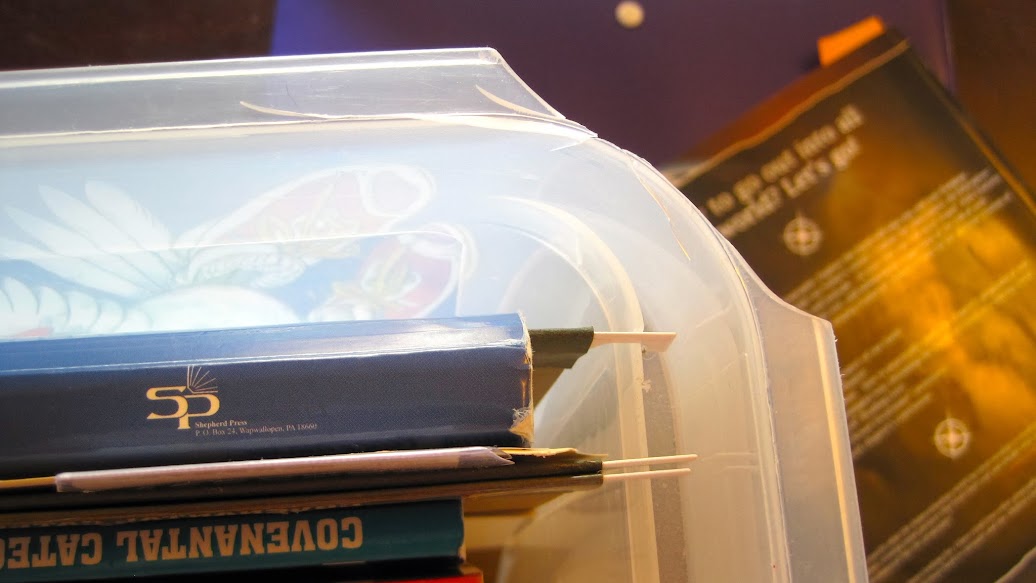
Plastic bins help keep things together and portable, but they don’t last forever. Because I am the only one that typically accesses this bin, I still use it even though it’s cracked with sharp edges. Sometimes I cover sharp edges with packing tape. Eventually, I’ll just have to replace it.
Such is life. Real life is not a Pinterest graphic.
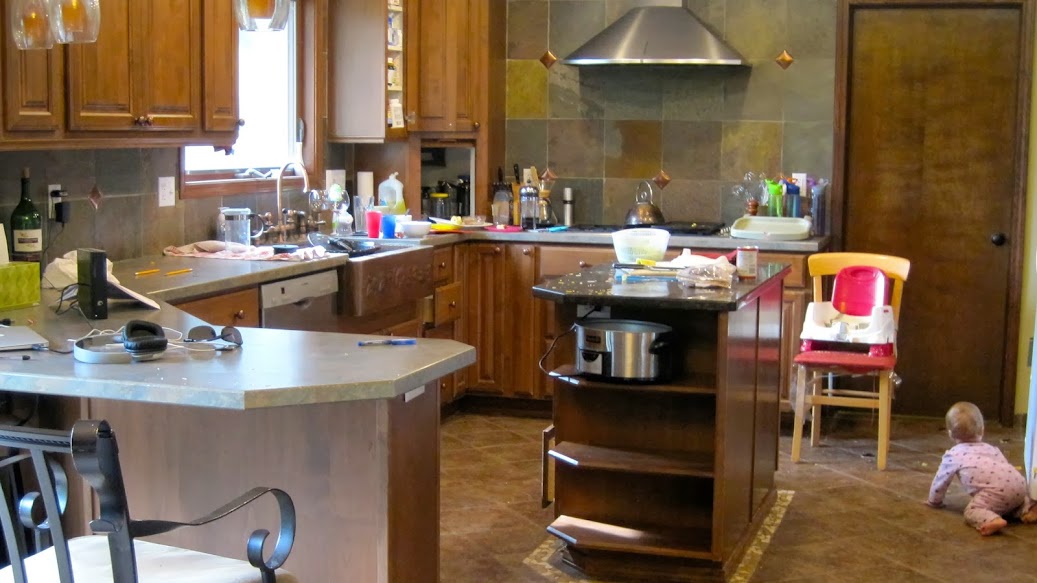
Alright. I took this picture to show what my kitchen looks like on a pretty good day all through the day. I did not even see the crockpot sitting on the display shelf of the island. But I needed it out of the way! And I was going to use it again tomorrow! So I just stuck it there to wait.
Our goal is loved, educated children, not a showcase home, right?
I’ve got the “not a showcase home” part, anyway, if that part counts. We’re trying for that loved, educated, bit, too, of course, but one never feels successful [enough] there, does one?
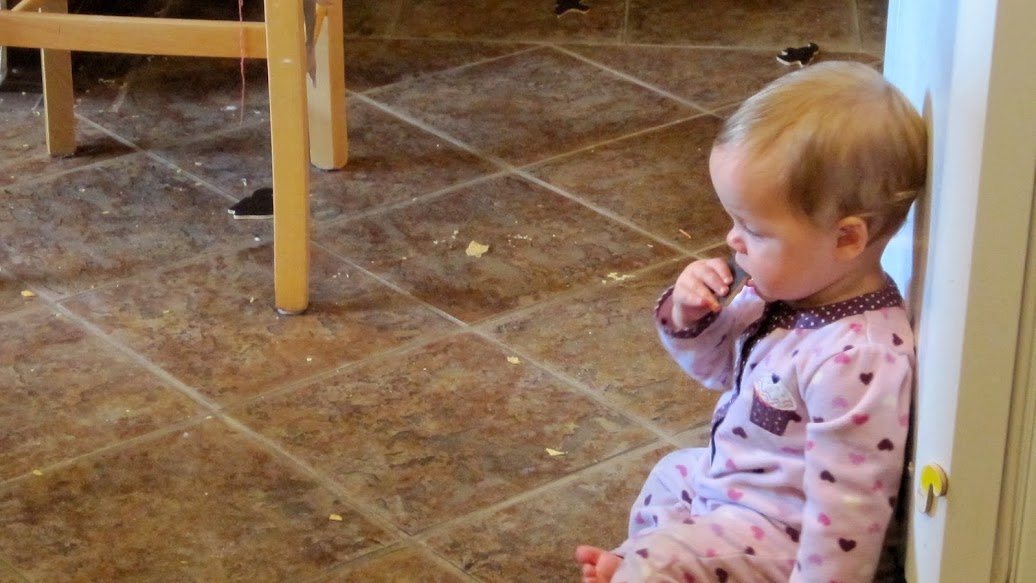
Shall we rub in the state of my floors? I think sweeping once a day is quite enough. At least here the baby is eating a magnet and not leftover chips off the floor. That’s better, right?
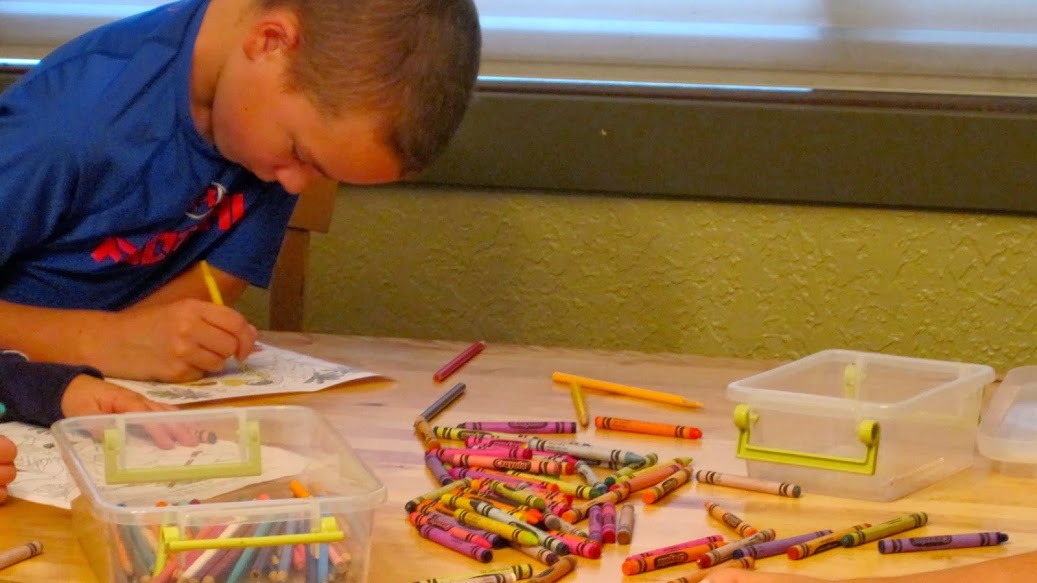
And that whole pencil & crayon thing: I now make sure they all get put away. While they are out, they are all out.
The kids do help put them away, I just take it as my responsibility to make sure they are all put away.
Also, I think I should have instituted a rule that only I sharpen the colored pencils. I’m not sure this set of 50 will last us the year at this rate.
So often we project our own hopes and ideals onto the partial glimpses we get of others. Please do not project onto me that I have it all together.
I do try, and sometimes I even try hard, but that doesn’t mean my house looks good more than once in a blue moon. And, I’m hoping that’s ok.
Homeschool Hack #15 – File by Scanning: Shred the Paper!
One of the clutter issues we homeschoolers have to deal with is all the papers and “records” (i.e. validation that we really aren’t slackers, which I think we all fear being) that we feel obligated to keep. The Well-Trained Mind has us keeping binder after binder, but sometimes we wish we could use all that bookshelf space for – I don’t know – books.
Now, if you tend toward the sentimental and not toward the clutter-averse, you might not like my approach. By all means, if you want to, keep keepsakes and samples and whatever else you like. I’m really not trying to talk you out of it.
But if you don’t want to keep it all – maybe even one half or one quarter of it all seems like more than you want to keep – I’ll share my solution. This solution has not yet been time-tested. I have not graduated any students. I have not had to prove myself to any official in any capacity yet. But I still think it will work just fine.
I keep a small – tiny – percentage of each child’s work, including their free-time drawing, writing, and projects. Actually, my unschooler sympathies come out here, because I tend to value what the kids did on their own time on their own initiative more highly than their assigned work (and I don’t assign much that leaves a physical trace, either). One math page, one written thing, one Latin sample, and then the cream of the drawing/free-time crop (the quantity varies), per child per term (every 6 weeks at our house).
Then, here’s the awesome, space-saving, clutter-annihilating part: I scan these. I save them on a hard drive (my husband takes care of frequent backups) and in Evernote (which will save them with OCR so the written words are searchable, even though they are images). Then, I shred them. Or, just toss them out in a big ol’ garbage bag with the rest of the papers that didn’t make the cut. Or, the kids’ favorite option: burning them in the fireplace.
- Type of container: Sterilite Drawer Set
- Contents: Papers you feel you must keep, waiting until Scanning Day
- Type of container: All-in-One Scanner
- Contents: Papers you feel you must keep, so you stack them on the tray and scan them
- Type of container: Evernote & Dropbox
- Contents: Papers you feel you must keep, saved digitally in the cloud, tagged & searchable
- Type of container: Shredder
- Contents: Papers you feel you must keep; let them go now.
In addition to these digital records, I also keep a Goodreads account for each of my readers that keeps a lifetime reading log. And, if they make something more involved and three-dimensional, we get pictures of it that are also digital records. The kids like to take the pictures themselves, and after it’s recorded, they aren’t too attached to keeping it forever and always.
I like this set up because
- We do have samples of work saved, but they don’t take up any space.
- Those samples won’t be torn or discolored or lost.
- I simply prefer digital information to paper.
- I love our all-in-one machine.
Being organized means making it work for you, your way, not you for it. If it makes your life harder rather than easier, that’s not organized.
Homeschool Hack #16 – Open Pencil Box

I’ve tried at least one, and often more like three solutions to solve the mysterious problem of the disappearing pencils, crayons, and any other necessary school supply.
If you have fastidious children, or if you are meticulous yourself, then you might not have this issue.
I’m thinking my 5-year-old might make a fastidious child if I don’t ruin her, but the others seem like myself: more clued into efficiency than neatness. In other words: fight any unnecessary expending of energy and effort. Perhaps, even, we might be simply lazy.
So, finally this year we’re doing much better on the pencil and crayon scene, and it’s because I’ve finally owned the problem myself. I can’t (or, at least, shouldn’t) be upset about the kids not keeping track of things if I can’t even do it myself. So, this year at least, keeping track is mostly my job. Until I have demonstrated (even if only to myself) that I can stay on top of this, I will not expect the children to stay on top of it.
In this case, it has been the organization of my attitude more than the organization of the pencils that has caused the shift. However, this shift has meant that there actually are pencils when we need them, without sighs or glares or snarky comments. Without glares, sighs, or snarky comments is the best success, but on top of that, as icing on the cake, there are also pencils.
- Type of container: Old Melissa and Doug wood box I don’t use but couldn’t throw away
- Contents:
- Type of container: Sterile Snap-Tight Container
- Contents:
- Container of colored pencils
- Container of markers
- Container of crayons
- Pencil boxes of supplies like watercolor pencils, scissors, & glue sticks
I like this set up because
- the school coloring sets stay together and nice because they are only used under my supervision, and I get them all the way put away (up high) when we’re done.
- I have an irrational affection for Sterilite containers.
- I’m controlling myself rather than trying to micromanage and control the children.
So often what needs organizing more than the stuff is my own attitude, stress, and expectations. Turns out, straightening that out sometimes leads to the stuff being more manageable, too.
Homeschool Hack #17 – “Inboxes” for the Homeschool
Multiple times over the last ten years, I’ve gone over David Allen’s Getting Things Done and made attempts at applying his advice to my home and routines. One concept he spends a lot of time addressing are inboxes: why you need them, how to be intentional about them, how to keep them empty.
“In,” in the GTD mindset, is any place that collects things you have to process and deal with.
Well, we have things we need to process when homeschooling, don’t we? So we need inboxes! All that means is an intentional place for those things to go, and a plan for taking care of them in their turn.
This year I have three school-related inboxes:
- A wood letter holder I bought at a rummage sale, mounted on the kitchen cart. This one is for the kids to put work I need to correct.
- A plastic mail sorter mounted in the basement. This one is for any (corrected, if necessary) work the kids want to keep. Mostly it gets filled up with free-time drawings. I try so sort through this at least once a term (6 weeks), and keep a selection of their best work.
- A poly-envelope I found at Office Depot for 99c each. These are for the papers I assign that the boys need to work on. This is also where they keep their planner page for the week and any homework-in-progress for their writing and speech classes.
- Type of container: thrifted wood mail sorter
- Contents:
- Work I need to check; this is where the boys put their work when they are finished with it.
- The other slot is where the envelope-packets live when they are not in use.
- Type of container: plastic pocket envelope
- Contents:
- Weekly planner sheets that we fill in together during our Monday meetings.
- Pages I’ve assigned to them & work they need to correct.
- Weekly planner sheets that we fill in together during our Monday meetings.
- Type of container: plastic mail sorter
- Contents:
- The kids stick in any papers they want to keep, including free time drawings. They each have their own slot.
- I add any work I’ve checked that I think is worth keeping.
I like this set up because
- When we’re done with a paper of any sort, everyone knows where it should go (that doesn’t mean they always put it there, of course)
- I don’t have to wonder if the math page on the counter is in-progress, to-correct, or all completed. Theoretically, there should never be a math page on the counter, but unfortunately I haven’t yet figured out how to live in my theoretical world. At least now I can say, “Hey, child, where does this belong?” and they can figure it out.
- I like saying, “Just put it in my inbox.”
Assigning inboxes is an idea that has worked in my home. Even if it might not work exactly this way in yours, perhaps it will spark an idea or two for a unique application to your unique situation.
Homeschool Hack #18 – Kitchen School Cart
So, I don’t really have any sort of office space on the main level, where we do most of our living and learning. Bedrooms are upstairs. Playroom and office and storage space is downstairs. Much as I would like to think that I could maintain a system of putting things away all the way downstairs when we were done, that’s just not going to happen. And, sometimes the hearth is not the best place for a row of file bins and stray papers. And, I am not a good housekeeper, but I’ve learned that keeping clear surfaces makes the house look better than it is, so I am loathe to give the school stuff space on my sprawling kitchen counter, though it attracts the stuff with a strong magnetic pull.
Years and years ago – probably 10 years and 3 moves ago – my mom gave me her old, inexpensive, beat-up kitchen cart. At the time, I was happy with whatever extra shelving I could get my hands on. Since moving into this house, the cart ended up tucked in a corder of my basement office space, lending inconvenient storage to an inconvenient space. I started keeping infrequently used school books and bins on it. Then I thought I should take advantage of its portable nature, and put Circle Time stuff on it, and tried to make myself move it to the more informal basement space. That didn’t work. But, I realized there was potential in this cart. So it came upstairs.
By the way, if you homeschool, you simply must be introduced to this concept of Circle or Morning Time. Cindy Rollins introduced the idea and inspired me to follow suit, for which I and my children shall ever be in her debt.
Now it is the portable homeschool cupboard. It can move to whatever part of the house is most convenient. On an average day, it can keep to itself in the corner of the dining room or next to the chore board. But, on a day when I want to pretend the house isn’t solely dedicated to homeschooling a gaggle of children, I can scooch it into the coat closet, close the curtain, and pretend to be normal. Except that the curtains covering the coat closet aren’t straight and don’t touch the floor. But that’s another personality issue altogether.
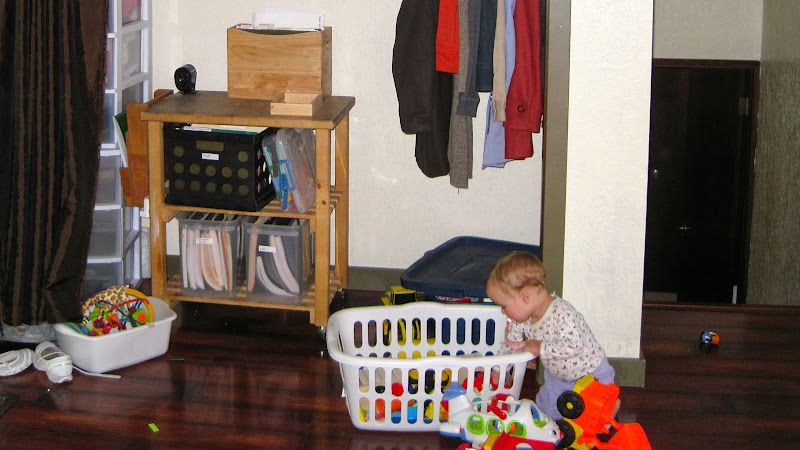
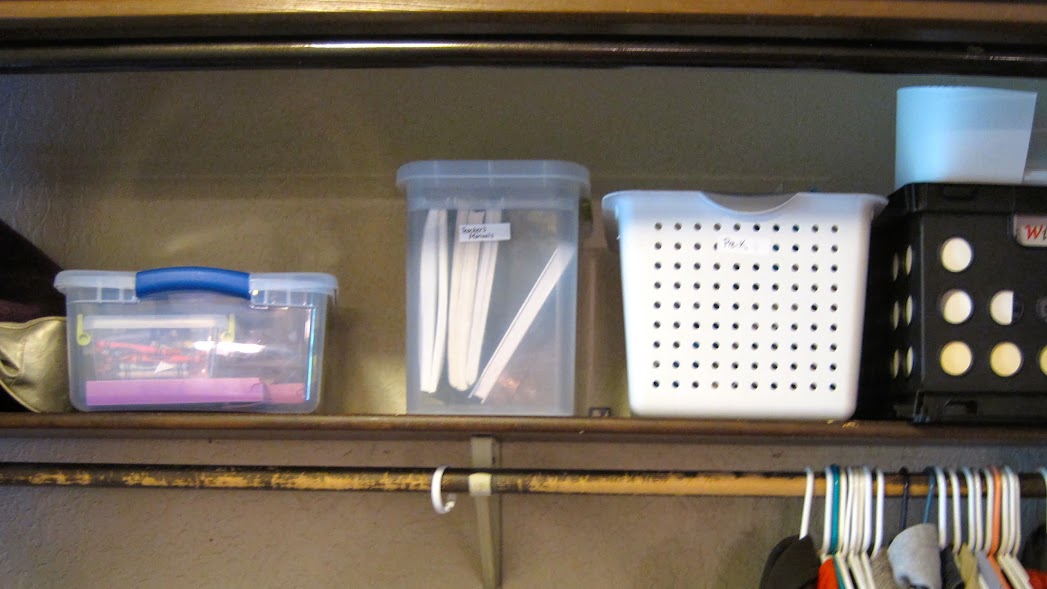
- Type of container: A hand-me-down kitchen cart
- Contents:
- Mounted pencil sharpener
- Pencil box
- File bins and crates with school books, manipulatives, and the like
- File box with blank paper of various types and a folder for completed work to keep.
- My teacher tote – any durable bag works I liked this one
- My teacher inbox – details forthcoming
I like this set up because
- It is a convenient size.
- It is portable.
- I can have the pencil sharpener mounted on it rather than in the basement, my kitchen, or the garage.
- It can be hidden.
- I used what I had and didn’t buy anything to make a storage solution that fit our space.
Being organized isn’t about being impressive; it’s just about not being continually frustrated and annoyed at yourself and your stuff.
Homeschool Hack #19 – My Desk-Drawer Tote Bag
I am not quite sure how this use of this craft tote evolved, but it did slowly over the course of last year, and now I am sold. This black craft tote caught my eye multiple times at WalMart, and one day, with birthday cash in my pocket, I sprung for it. I put in my craft stuff, but I only used 1/5 of it for my small cross stitch project (going on its 6th year in progress), and none of the sections really seemed to work well for yarn and crochet projects. So, I started putting my “currently reading” books in it, along with some post it notes and a pencil and a reading light. That was ok until I started reading a book that didn’t fit. And it was kinda heavy.
I think it was one day we were heading out for a play day, but the boys still had to finish their math. I had some small things to return to people and a few baby supplies, so I loaded up this craft tote with the things instead of taking a purse and diaper bag and extra bag. Then, I ended up sticking my container of my favorite pens and pencils in one of the partitions. And then I didn’t unpack it after that. And, after a few weeks, I realized that this tote was now my “teacher supply bag.”
I didn’t realize how handy it would be to have a little portable “office drawer” that can move with us wherever we end up doing Circle Time or lessons or reading. I love having everything on hand, and all corralled and ready-for-action. I don’t have a desk or office-type space on our mail level, so this tote acts as my portable desk drawer.
Portable is always practical.
- Type of container: Small craft tote or caddy
- Contents:
- My pens and pencils
- My dry-erase markers and Sharpie pens in a pencil case
- A small dry-erase board and stand
- The kids’ 1-gen iPod shuffles and headphones in a zippered pouch and a USB wall charger (loaded with an audio book, memory verses, and catechism recordings)
- Our current Circle Time book
- A sunglasses case with nail clippers, nail file, and nail polish. (Ok, I admit it: I got that idea from Pinterest.)
- Post-it notes, Post-it flags, 3-hole protector stickers
- Small dispenser of heavy-duty packing tape for emergency book repairs
I like this set up because
- Everything in it is visible and accessible, and it’s quick to pull out what I need and quick to put it back.
- Sometimes my husband writes notes on the board or corrects math pages, and now he knows the home for any sort of supply he might need for those tasks is in this bag, visible and ready.
- It’s quickly and easily portable, since school might happen anywhere around the house or even outside or at the park.

Giving your stuff a convenient home to live in is critical to being organized, because you need to know where your stuff is when you need it. Find unconventional uses for the containers you already have!
Homeschool Hack #20 – Chore Board (with Cloak of Invisibility)
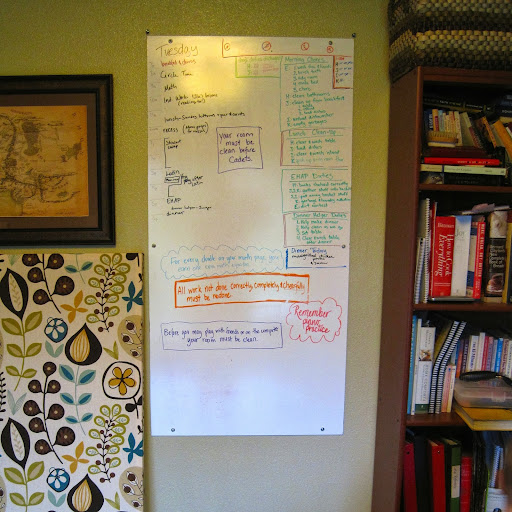
I’ve created a few iterations of a chore board over the last year and a half. First it was a poster board frame, and I wrote directly on the hard plastic frame. That worked well, because I could tuck it away quickly and easily when I didn’t want our schedule, consequences, and school assignments on display.
Then, my 3-year-old used it as a slide (which means he was climbing up it). The frame and plastic cracked. I tried to salvage it by simply sticking printed pages on it, but that simply didn’t work as well nor look as good.
So I explained the situation to my husband, asking for his diy-expertise to solve all my chore-board-issues. He is the brains and brawn behind this perfect solution.
First, he bought a sheet of shower board at Home Depot. Then he figured out what size we had room for on the wall where it would be most convenient to have a whiteboard for schedules, chore charts, consequences, reminders, and all those good things. He cut the sheet to size and screwed it to the wall. Then, I bought fabric I liked. That’s the sum of my contribution to this project. Next, he built a lightweight frame out of scrap lumber that would fit over the board. Then he stretched the fabric over it and stapled it to the back of the frame.
Voila!
Now I have the convenience of a message board in the most useful part of the house, but with the option of covering it up so I can still pretend to have a home not overrun with homeschooling.
- Type of container: Whiteboard made out of cheap shower board
- Organizing materials: Expo fine-point dry erase markers
- Contents:
- Schedule/Routine/”Flow Chart” – I wrote the hours in wet-erase marke and then change up the day’s events based on reality
- Consequences doled out – including income earned from chores
- Reminders such as “Do not even ask to play with friends or on the computer if your room is not clean.”
- List of chores
- Dinner menu
If I were really a Good Mom, I would write love notes and jokes on it, too, I suppose. There have been no love notes or jokes. You may draw your own conclusions.
I like this set up because
- With a written chore list and day’s plan, my nagging and harping is drastically reduced
- With the consequences (like “nap,” “no computer,” etc.) tracked, I don’t have to remember what I said in order to be consistent (consistency was losing before, because memory is always losing).
- I still have the option of covering it up and pretending we have a normal house. Well, normaler, anyway.
- With dinner written down, I don’t have to hear the question asked 58 times every day. They still asked even when my consistent reassurance was, “Food.” Now, they no longer ask, because the board gives a better answer.
Chalkboard might be in, but this cheap, large, rough diy solution fits the bill at our house – without added dust.